

All blog posts
Explore the world of design and learn how to create visually stunning artwork.
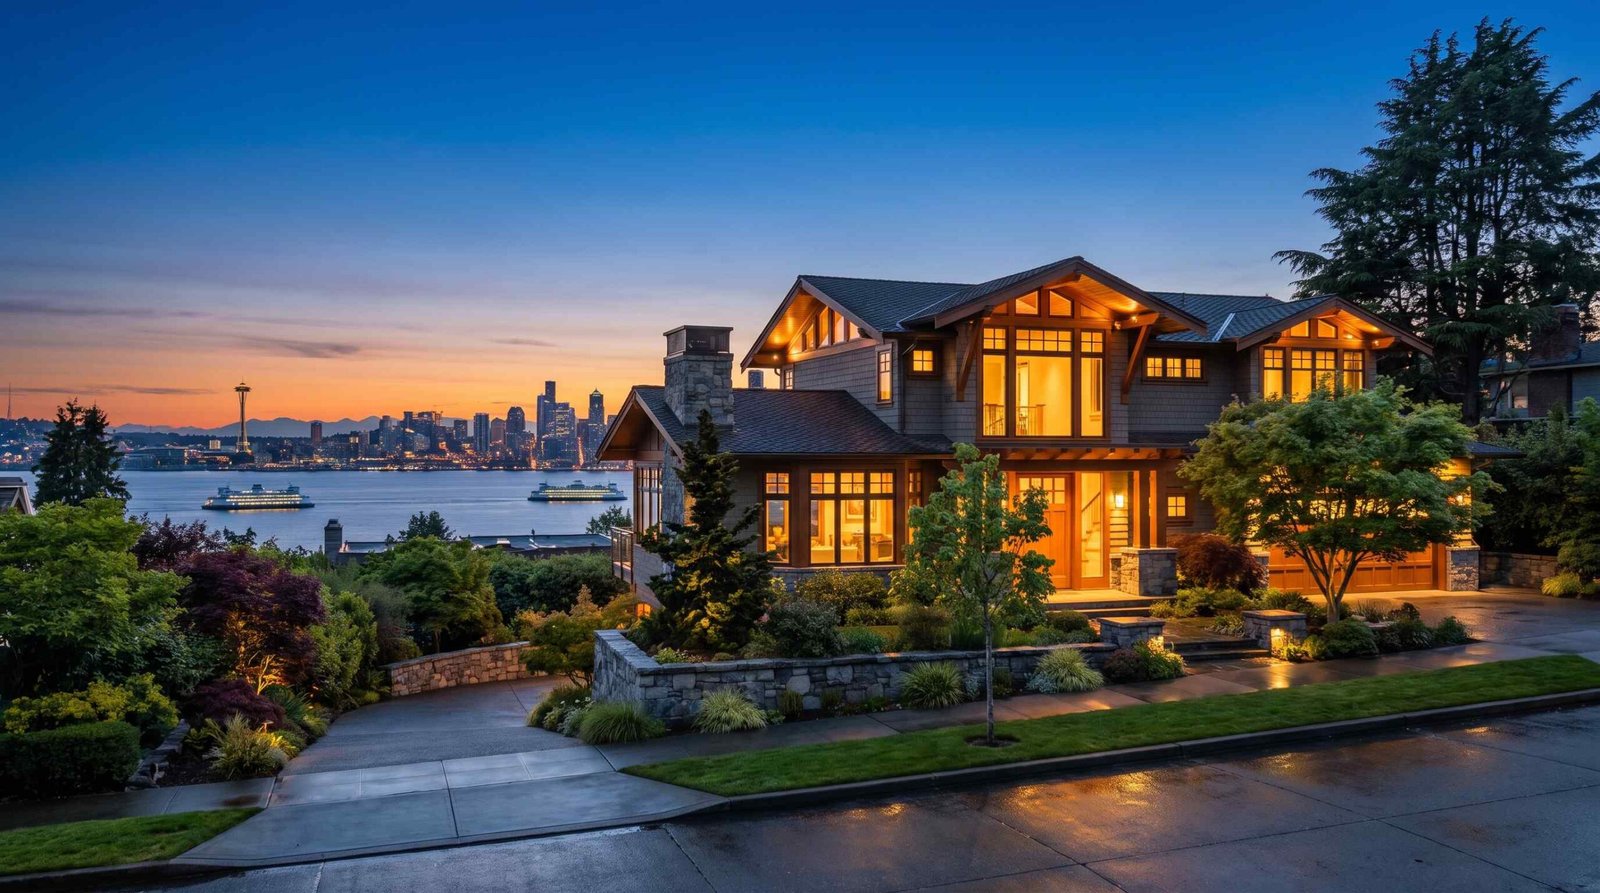
Real Estate Photographer Seattle: The Complete Agent’s Hiring Guide (2026)
October 1, 2026 | by Ian
Real Estate Photographer Los Angeles: The Complete Agent’s Hiring Guide (2026)
September 1, 2026 | by Ian
Real Estate Photography Camera Settings: The Complete 2026 Guide
June 5, 2026 | by Ian
Real Estate Photographer San Diego: The Complete Hiring Guide (2026)
June 4, 2026 | by Ian
Real Estate Photography Philadelphia: The Complete Agent’s Guide (2026)
June 3, 2026 | by Ian
Real Estate Photographer Phoenix: The Complete Agent’s Hiring Guide (2026)
June 2, 2026 | by Ian
Real Estate Photography Chicago: Complete Guide for Agents [2026]
June 2, 2026 | by Ian
Real Estate Photography Tips: The Practical Photographer’s Playbook (2026)
May 28, 2026 | by Ian

Real Estate Photographer Seattle: The Complete Agent’s Hiring Guide (2026)
If you’re listing a home in Seattle, the photos will do more selling than any open house, any yard sign, or any carefully written MLS description. Buyers here scroll fast, compare hard, and make up their minds about a showing in the first three images. A professional real estate photographer in Seattle usually costs between $250 and $450 for a standard listing, and the right one will pay for that fee many times over in showing traffic alone.
This guide is written for agents and home sellers, not photographers. We’ve spent years shooting homes from Ballard bungalows to Medina waterfront estates, and we know what separates a photographer who simply shows up from one who actually moves a listing. Below you’ll find real 2026 pricing, a neighborhood-by-neighborhood breakdown, the drone airspace rules that trip up out-of-town shooters, how Seattle’s famous gray skies really affect your photos, and the exact questions to ask before you book anyone.
Quick answer: A real estate photographer in Seattle typically charges $125 to $249 for a basic shoot, $250 to $449 for a mid-range package, and $450 to $699 for premium packages with drone and floor plans. Luxury full-service shoots with Matterport 3D and video run $700 to $1,500 or more. Most agents book in the $250 to $450 range.
Seattle is not a market where you can get away with phone photos or a cousin with a nice camera. With a median sale price hovering near $849,000 and Eastside listings regularly crossing $1.5 million, buyers expect images that look like they belong in a design magazine. Let’s break down exactly what that costs and how to hire well.
What Does a Real Estate Photographer in Seattle Cost?
Pricing in the Seattle metro sits noticeably above the national average. That’s not photographers being greedy. It’s the cost of living here, the traffic between Tacoma and Everett, and the simple fact that a $1.2 million listing deserves more time on site than a $300,000 condo in a cheaper market. Most established Seattle photographers price by square footage, by package, or by a combination of both.
Here’s what you can realistically expect to pay in 2026 across the four main tiers.
| Package Tier | Typical Price | What’s Included |
|---|---|---|
| Budget | $125 to $249 | Basic HDR photography, 15 to 25 edited photos, same-day or next-morning turnaround. Best for condos and smaller homes under 1,500 sq ft. |
| Mid-Range | $250 to $449 | 30 to 50 photos, flash-blended interiors, exterior shots plus a twilight or detail option, next-day delivery. The sweet spot for most Seattle single-family listings. |
| Premium | $450 to $699 | 50+ photos, drone aerial photography, 2D floor plan, virtual tour option, priority scheduling. |
| Luxury / Full-Service | $700 to $1,500+ | Full or half-day shoot, Matterport 3D tour, cinematic video walkthrough, virtual staging, twilight session, lifestyle and detail imagery. |
Typical Seattle-area real estate photography package pricing, 2026. Prices vary by square footage and travel distance.
Square footage matters more than most agents expect. A 1,200 sq ft Fremont townhouse might take 75 minutes to shoot. A 5,500 sq ft Sammamish home with a bonus room, media room, three-car garage, and a backyard sport court can easily take three hours before editing even starts. Many photographers add $50 to $100 for every 1,000 sq ft above a base size, usually 2,000 or 2,500 sq ft.
Common Add-On Prices in Seattle
If you’d rather build a custom package than buy a bundle, these are the going rates for individual services around King and Snohomish counties.
| Add-On | Price Range |
|---|---|
| Aerial / drone photography | $150 to $300 |
| Twilight photography | $150 to $250 |
| Matterport 3D virtual tour | $150 to $400 |
| Video walkthrough | $200 to $500 |
| Virtual staging (per room) | $75 to $150 |
| Floor plan | $75 to $150 |
A la carte add-on pricing commonly quoted by Seattle-area real estate photographers.
Bundles almost always save money. A photographer who charges $350 for photos, $200 for drone, and $125 for a floor plan separately ($675) will often bundle all three for $550 or less. If you know you need more than one service, ask for package pricing before you book piece by piece.
Is Cheaper Ever Worth It?
Sometimes. A studio condo in the University District renting to students doesn’t need a $700 shoot. But here’s the math that matters: on an $849,000 home, a 1% difference in final sale price is $8,490. If better photography brings in two more serious buyers and nudges the offer up even half a percent, a $400 shoot returns more than ten times its cost. Underspending on photos is one of the most expensive “savings” in real estate.
Seattle’s Real Estate Market: Why Photography Standards Are Higher Here
Seattle isn’t a typical American housing market, and the photography standard reflects that. According to the latest Seattle housing market report from Beyond WA, the city’s median home sale price sits around $849,000, with homes routinely selling at 100% to 100.5% of asking. Inventory has loosened to roughly 4.3 to 4.5 months, which puts the market close to balanced. That shift is exactly why photography matters more now than it did in the bidding-war frenzy of 2021. When buyers have options, the listing with the best first impression gets the first showing.
Price Points That Demand Premium Images
Cross Lake Washington and the numbers climb fast. Bellevue’s median listing price is about $1.6 million. Kirkland sits near $1.36 million and Redmond around $1.28 million. At those price points, buyers aren’t just looking for a house. They’re evaluating finishes, ceiling heights, sightlines, and how the light moves through the kitchen at 4 p.m. If your photos look flat or underexposed, a $1.6 million home reads like a $900,000 one online, and buyers mentally discount it before they ever walk in.
Tech Buyers Are Sophisticated Shoppers
Amazon’s headquarters in South Lake Union and Microsoft’s campus in Redmond anchor a buyer pool that is analytical, data-driven, and used to polished digital products. Many of these buyers build spreadsheets comparing listings. They zoom in on photos. They notice when a window is blown out or a ceiling looks warped from a cheap wide-angle lens. Plenty of them are also relocating from the Bay Area, Austin, or overseas and will shortlist homes purely from what they see on a screen.
This is a buyer who rewards quality and punishes shortcuts. A photographer who understands vertical line correction, accurate color, and natural-looking window views gives your listing an edge with exactly the audience most likely to write a strong offer.
Buyers Start Online, Almost Without Exception
The National Association of Realtors Profile of Home Buyers and Sellers has shown for years that roughly 97% of buyers use the internet during their search, and buyers consistently rank photos as the single most useful feature on a listing site. In Seattle, where the share of tech-literate buyers is unusually high, you can treat that number as close to universal. Your photos are your showing before the showing.
Speed Raises the Stakes
Seattle homes typically spend a median of 14 to 23 days on market, and well-priced homes in neighborhoods like Wallingford or Ravenna often go pending in the first weekend. That window means you don’t get a second chance at launch. If your listing goes live with mediocre images and you reshoot a week later, you’ve already burned your most valuable exposure period on Zillow, Redfin, and the NWMLS feed. Get it right on day one.
Seattle’s Best Real Estate Photography Services: What to Look For
Search for real estate photographers in Seattle and you’ll find Yelp listings, Instagram accounts, a handful of large media companies, and plenty of Reddit threads asking who’s actually good. None of that tells you how to choose. Here’s the framework we suggest using when you evaluate anyone.
1. Portfolio Quality and Relevance
Look at full galleries, not just the five hero shots on a homepage. Ask for two or three complete listing sets from the past six months. Check that vertical lines are straight, windows show the view outside instead of glowing white, colors look true (no orange walls or blue-tinted ceilings), and rooms feel proportional rather than stretched. If they shoot homes like yours, in neighborhoods like yours, even better.
2. Turnaround Time
In a market this fast, 24 hours is the standard and next-morning delivery is common. Some photographers offer same-day turnaround for a small rush fee. Anything over 48 hours should make you hesitate unless you’re scheduling well ahead of your listing date.
3. Equipment and Technique
You don’t need to become a gear expert, but you should know the basics. A professional should be shooting with a full-frame or high-quality APS-C camera, a tilt-shift or rectilinear wide-angle lens, a sturdy tripod, and off-camera flash or strobes. Our guide to professional real estate photography equipment walks through what serious shooters carry and why it matters. The short version: flash capability is non-negotiable in Seattle, where interior light can be dim for half the year.
4. Local Knowledge
A photographer who knows Seattle understands that Queen Anne view homes need a clear-day exterior, that Lake Washington glare peaks in the afternoon, and that a drone flight in Georgetown requires FAA authorization while one in parts of Sammamish may not. They know which side of the street to shoot from in Phinney Ridge to catch the Olympics, and they know how long it takes to get from Shoreline to Issaquah at 3 p.m. on a Thursday. That knowledge shows up in better images and on-time arrivals.
5. Range of Services
Even if you only need photos today, working with someone who also offers drone, floor plans, 3D tours, and video saves you from coordinating three vendors on your next luxury listing. One appointment, one invoice, one consistent visual style.
Services to Expect at Each Tier
| Service | Budget | Mid-Range | Premium | Luxury |
|---|---|---|---|---|
| Edited interior and exterior photos | 15 to 25 | 30 to 50 | 50+ | 60+ with detail shots |
| Flash or flambient lighting | Sometimes | Yes | Yes | Yes, multi-light |
| Twilight images | No | Virtual twilight often | Optional | Live twilight session |
| Drone aerials | No | Add-on | Included | Included, photo and video |
| Floor plan | No | Add-on | Included | Included, often measured |
| 3D virtual tour | No | No | Optional | Matterport included |
| Video walkthrough | No | No | Add-on | Cinematic edit included |
| Turnaround | Same or next day | Next day | Next day | 24 to 72 hours (video longer) |
What Seattle agents can expect from each photography tier.
Seattle Neighborhood Guide: Photography Needs by Area
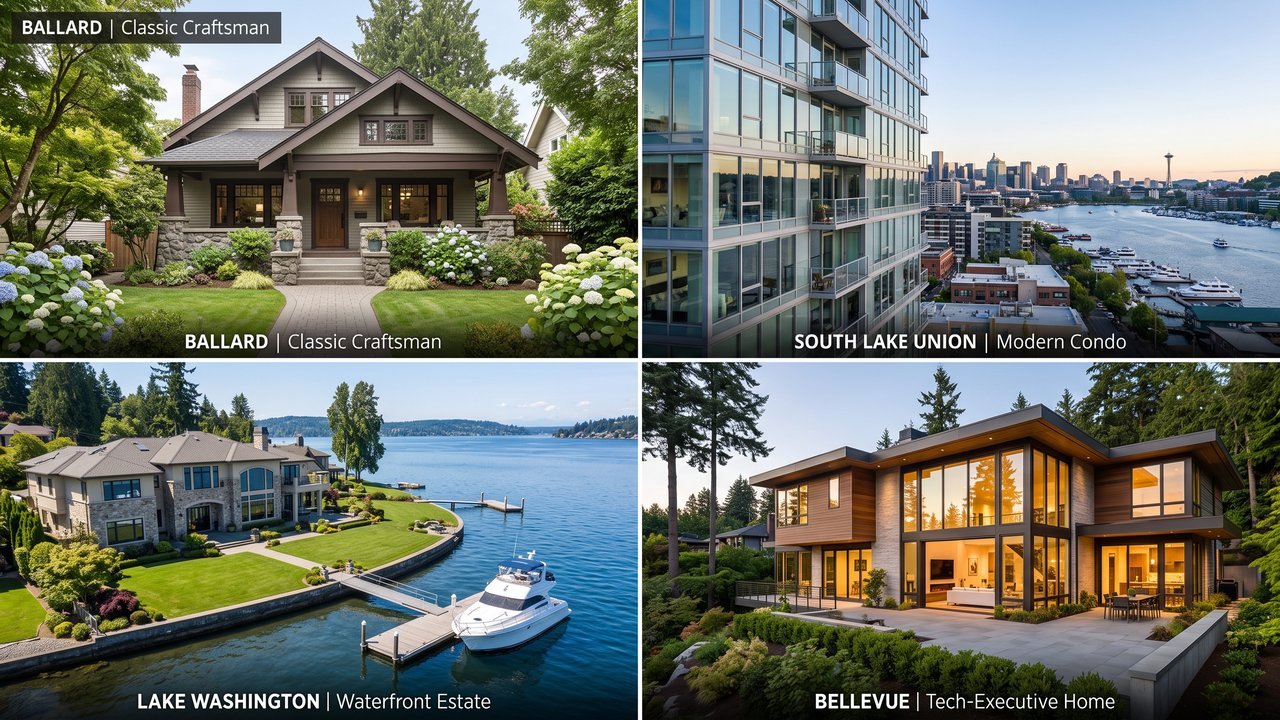
Seattle is a patchwork of micro-markets, and a one-size-fits-all approach to photography leaves money on the table. A Capitol Hill condo and a Mercer Island waterfront estate need completely different shoot plans. Here’s how we think about the major areas.
1. Downtown, Capitol Hill, and South Lake Union
This is Amazon territory. You’ll see glass towers, luxury high-rise condos, newer mid-rise buildings, and a buyer pool heavy with young tech professionals and relocating employees. Unit sizes are compact, so a photographer has to make a 700 sq ft one-bedroom feel open without distorting it. Lens choice matters here; an ultra-wide that turns a living room into a bowling alley will backfire when buyers show up.
The hero shot in this zone is usually the view. Space Needle sightlines, Lake Union, Elliott Bay, the city grid lit up at night. A twilight session from a high floor, with interior lights balanced against a deep blue sky and the skyline glowing, is often the single best image in the gallery. Building amenities matter too: rooftop decks, fitness centers, and lobbies deserve a few frames, since condo buyers weigh them heavily.
2. Queen Anne
Queen Anne hill offers some of the most photographed views in the city, looking south over downtown, the Space Needle, and Mount Rainier on a clear day. Housing stock leans toward Craftsman homes, Tudors, and stately early-1900s houses on the upper hill, with condos and apartments on the lower slopes.
Wide-angle exterior shots are essential for these homes because many sit on narrow lots with steep front steps and mature trees. A good photographer will shoot from across the street or use a mast pole to get above hedges. If the home has a view, schedule the exterior for a clear morning when Rainier is visible. That one image can define the entire listing.
3. Ballard, Fremont, and Wallingford
These neighborhoods are full of character Craftsman bungalows, mid-century boxes, and newer modern townhomes. Price points are more modest than the view neighborhoods, often between $750,000 and $1.1 million for a single-family home, but buyer traffic is intense. These are the listings that draw 40 groups to a Saturday open house.
Curb appeal photography is critical here. Buyers are choosing between several similar bungalows on similar streets, and the front exterior image decides which one they click. Freshly mowed lawn, porch styled with a couple of planters, cars off the street, and a bright, straight-on shot with blue sky (real or replaced). Inside, detail shots of original built-ins, fir floors, and updated kitchens help these homes feel special rather than interchangeable.
4. Madison Park, Madrona, and Leschi
Along the western shore of Lake Washington, these neighborhoods combine older architectural homes with sweeping water and mountain views. Many properties are lake-view or true lakefront, and prices regularly run from $1.5 million into eight figures.
Natural light and water views are the hero shots. The photographer’s job is to balance bright lake light pouring through big windows with a correctly exposed interior, so buyers see both the living room and the Cascades beyond it. This is where flash blending or careful bracketing pays for itself. Timing matters too. East-facing lake views look best in the morning before the sun moves behind the house, and a drone shot showing the home’s position on the water helps buyers understand the setting instantly.
5. Mercer Island
Mercer Island feels like a private retreat a few minutes from both downtown Seattle and Bellevue. It’s one of the most exclusive markets in the region, with luxury waterfront homes, private docks, and large wooded lots. Buyers here expect a polished, full-service presentation, and full-service photography is simply the standard.
That means a long shoot day, a live twilight session, drone aerials of the shoreline and dock, a Matterport tour for out-of-town buyers, and often a cinematic video. Lifestyle details like a wine cellar, a boathouse, or an outdoor kitchen get their own frames. If you’re new to this tier of listing, our guide to luxury real estate photography covers how top photographers plan and light high-end homes so they read as true luxury rather than simply large.
6. Bellevue, Kirkland, and the Eastside
Bellevue’s median listing price of about $1.6 million tells you most of what you need to know. This is the Microsoft and tech corridor, with a mix of modern new construction, large 1990s and 2000s luxury homes, high-rise condos downtown, and lakefront estates in Medina, Clyde Hill, Yarrow Point, and along the Kirkland waterfront.
Expect full-service packages to be the norm above $1.5 million. Modern architecture rewards precise composition: clean verticals, symmetrical framing, and carefully balanced window exposures that show off floor-to-ceiling glass. Kirkland’s waterfront condos and homes around Juanita Bay benefit from twilight shots, when the lake turns a soft blue and interior lighting warms up the scene. Downtown Bellevue high-rise listings follow the same playbook as South Lake Union, with views and amenities leading the gallery.
7. Redmond, Sammamish, and Issaquah
These tech-adjacent suburbs draw families who want space, good schools, and a reasonable commute to the Microsoft campus. You’ll find large family homes on generous lots, newer subdivisions, and custom luxury builds on acreage in the Sammamish plateau and the hills around Issaquah.
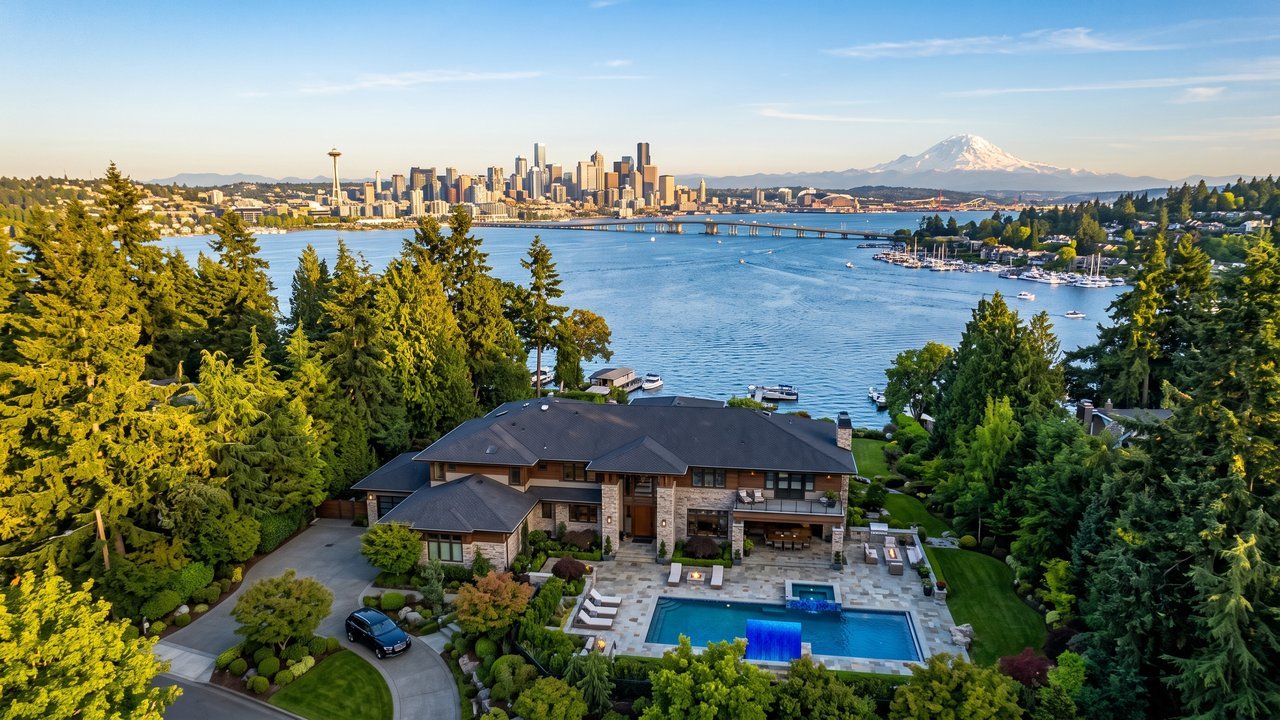
Drone aerials are highly effective here, maybe more than anywhere else in the region. A ground-level photo can’t show a one-acre lot, a backyard that backs onto a greenbelt, proximity to Lake Sammamish, or the view of Tiger Mountain. A single aerial frame communicates all of that in a second. Inside, bonus rooms, home offices, and media rooms deserve dedicated coverage, since remote and hybrid workers weigh them heavily.
Neighborhood Comparison at a Glance
| Area | Home Style | Typical Price Range | Photography Priority |
|---|---|---|---|
| Downtown / Capitol Hill / SLU | High-rise and mid-rise condos, townhomes | $450,000 to $2M+ | Twilight skyline views, amenity shots, careful wide-angle use |
| Queen Anne | Craftsman, Tudor, historic homes | $1M to $3M+ | Clear-day view exteriors, wide-angle curb shots |
| Ballard / Fremont / Wallingford | Craftsman bungalows, mid-century, modern townhomes | $700,000 to $1.3M | Curb appeal, character details, bright interiors |
| Madison Park / Madrona / Leschi | Architectural homes, lake-view and lakefront | $1.5M to $10M+ | Balanced window views, morning light, drone of shoreline |
| Mercer Island | Luxury waterfront, wooded estates | $2M to $15M+ | Full-service: twilight, drone, Matterport, video |
| Bellevue / Kirkland | Modern new builds, luxury homes, high-rise condos | $1.2M to $8M+ | Architectural precision, full-service packages, twilight |
| Redmond / Sammamish / Issaquah | Large family homes, custom builds on big lots | $1M to $3M+ | Drone aerials of lot and setting, bonus room coverage |
Photography focus by Seattle-area neighborhood. Price ranges are approximate for single-family and condo listings in 2026.
Drone Aerial Photography in Seattle: Airspace and What to Know
Drone shots are one of the most requested add-ons in the region, and also one of the most misunderstood. Seattle has some of the most complicated low-altitude airspace of any American metro, and a photographer who doesn’t take it seriously can put your listing, and your brokerage, in an awkward spot.
SeaTac and Boeing Field
Seattle-Tacoma International Airport (KSEA) sits under Class B airspace, the most tightly controlled category in the country. Its footprint covers much of south King County and stretches over downtown Seattle. Just south of downtown, King County International Airport, better known as Boeing Field (KBFI), adds its own Class D controlled airspace. Renton Municipal (KRNT) and Paine Field (KPAE) to the north add more controlled zones, and float plane traffic on Lake Union and Lake Washington means pilots need to stay alert even where the charts look quiet.
LAANC Authorization
Commercial drone flights in controlled airspace require authorization from the FAA, most commonly through LAANC (Low Altitude Authorization and Notification Capability). LAANC lets a certified pilot request permission through an approved app and, in many grid areas, receive near-instant approval up to a set altitude ceiling. In large parts of Seattle proper, that ceiling may be 100 feet, 200 feet, or even zero near the airports, which means some properties simply can’t be flown without a more involved FAA waiver process.
The governing rules are found in FAA Part 107, the federal regulation for small unmanned aircraft. It covers pilot certification, altitude limits (generally 400 feet above ground level), visual line of sight requirements, flying over people, and operations in controlled airspace. Any photographer flying a drone for your listing is operating commercially, which means Part 107 applies every single time.
The Eastside Advantage
Bellevue, Kirkland, Redmond, Sammamish, and Issaquah generally face fewer low-altitude restrictions than downtown Seattle. Much of the Eastside sits beneath the higher shelves of the Seattle Class B airspace, so flights at typical real estate heights often fall in uncontrolled airspace. That’s one reason drone aerials are so common on Eastside listings. Still, every flight needs a fresh airspace check, because temporary flight restrictions pop up for events, VIP visits, and emergencies.
Local Rules Beyond the FAA
Seattle Parks and Recreation restricts launching drones from city parks, and many HOAs and condo associations have their own policies. A good photographer launches from the client’s property or another location with permission, and checks with building management before flying near high-rises.
Verify the Certificate
Always ask to see a current FAA Part 107 Remote Pilot Certificate before booking drone work. It takes a photographer ten seconds to send a photo of the card, and any hesitation is a red flag. You should also ask whether they carry drone liability insurance, since a standard business policy often excludes aircraft. For a broader look at how to judge photographers on technique and professionalism, our collection of real estate photography tips covers the details that separate pros from hobbyists.
Seattle Weather and Photography: The Real Story
Every agent who moves here from somewhere sunnier worries about the weather. Yes, Seattle averages about 152 sunny days a year compared with a national average around 205. But here’s what experienced local photographers know: gray skies are often a gift, not a curse.
Why Overcast Light Flatters Interiors
Cloud cover acts like a giant softbox over the house. Instead of harsh sunbeams slicing across floors and creating hot spots and deep shadows, window light comes in soft and even. That makes interiors easier to balance, colors more accurate, and rooms more inviting. Many photographers in sunnier markets actually wait for clouds to shoot interiors. Seattle hands them that condition for free.
How Seasoned Seattle Photographers Plan Around Weather
The smart approach is to split the shoot when the forecast is mixed. Interiors go first on cloudy days, when diffuse light produces clean results. Exteriors get scheduled for the clearest window available, which might be a quick return visit or a later slot that same afternoon. Many photographers include free exterior reshoots within a week if weather ruins the first attempt, and that’s a policy worth asking about.
For listings with a tight launch date, sky replacement has become a standard and accepted practice. A gray, featureless sky gets swapped for a soft blue one during editing. Done well, it’s invisible. Done poorly, it creates halos around trees and rooflines, so check portfolios for natural-looking sky edits.
Blue Hour Works Beautifully Here
Twilight photography, shot in the 20 to 40 minutes after sunset, is one of the most effective upgrades in this market. Cloud cover actually helps. Instead of a single bright band on the horizon, clouds spread the remaining light into an even, moody glow that wraps around the house while warm interior lights pop against the cool exterior. Our guide to twilight real estate photography explains how photographers time and light these sessions, and why a single twilight image often becomes the listing’s main photo.
Virtual Twilight
When a live twilight session isn’t practical, virtual twilight is the budget-friendly alternative. The photographer takes a daytime exterior, even a cloudy one, and digitally transforms it into a blue-hour scene with glowing windows and a dusky sky. It usually costs $25 to $75 per image, compared with $150 to $250 for a live session. It won’t match a real twilight shoot on a luxury listing, but for a Greenwood bungalow or a Kirkland townhome, it gives you a striking main image at a fraction of the cost.
Fall and Winter Shooting (October Through March)
Daylight shrinks dramatically in winter. By December, the sun sets around 4:20 p.m. and you get roughly eight and a half hours of usable daylight. That compresses the shooting schedule. Photographers book up fast for late-morning and early-afternoon slots, so plan ahead.
- Book exteriors for midday. The sun stays low all winter, so 11 a.m. to 2 p.m. gives the most even exterior light.
- Turn on every light. Lamps, pendants, under-cabinet strips, and fireplace. Warm light makes homes feel cozy when it’s gray outside.
- Use early sunsets to your advantage. A 4:45 p.m. twilight session fits neatly after a midday interior shoot, often in a single visit.
- Insist on flash. Ambient-only interiors can look muddy and gray in December. Flash or flambient lighting keeps colors clean.
- Prep the yard. Clear leaves, moss on walkways, and fallen branches. Wet pavement looks fine; piles of soggy leaves don’t.
The Summer Advantage
From late May through September, Seattle turns into one of the best places in the country to shoot real estate. Around the June solstice you get close to 16 hours of daylight, long golden hours, and remarkably consistent dry weather, especially from July through mid-September. Gardens are in full bloom, Rainier is often visible, and twilight sessions start after 9 p.m. If you have flexibility on listing timing for a view property, summer imagery is hard to beat.
Matterport 3D Tours and Virtual Staging in Seattle
Seattle has a constant flow of relocating buyers. Amazon, Microsoft, Google’s Kirkland and Fremont offices, Meta, and dozens of startups bring in new hires from across the country and around the world. Many of these buyers can’t fly in for a weekend of showings, especially when a home might go pending before they book a flight.
Why 3D Tours Matter Here
A Matterport 3D tour lets a buyer in Austin or Bangalore walk through your listing room by room, check how the kitchen connects to the family room, and even measure spaces. For relocating buyers, it’s often the difference between “we’ll wait until we can visit” and “let’s make an offer.” In Bellevue, Mercer Island, and the higher end of Kirkland, Matterport has become essentially standard for listings above $900,000, and its absence can make a luxury listing feel incomplete.
3D tours also filter out casual lookers. Buyers who request a showing after walking the virtual tour already know the layout works for them, which saves sellers from a parade of unqualified visits. Our full overview of 3D real estate photography and virtual tours covers the differences between Matterport, iGuide, and other platforms, plus what to expect on scan day.
Virtual Staging for Vacant Properties
Vacant homes photograph poorly. Empty rooms look smaller than they are, and buyers struggle to judge scale. This is especially common in South Lake Union and Capitol Hill, where investor-owned condos and tech-era rentals often hit the market empty after a tenant moves out.
Physical staging in Seattle can cost $2,500 to $6,000 or more for a typical home, plus monthly rental fees. Virtual staging runs $75 to $150 per room. Staging the living room, primary bedroom, and dining area digitally might cost $300 to $400 total and produce images that look fully furnished. Just make sure every virtually staged image is clearly labeled as such in the MLS, per NWMLS and fair advertising standards, and include at least one unstaged photo of each staged room so buyers aren’t surprised at the showing.
Red Flags When Hiring a Seattle Real Estate Photographer
Most photographers in the Seattle market are hardworking professionals. A few aren’t. These seven warning signs will help you spot the difference before you hand over a key.
1. No Online Portfolio, or No Seattle-Area Work
A real estate photographer without a portfolio is like a listing agent without a sales history. If they have a portfolio but it’s all Phoenix stucco homes or Florida condos, that’s a concern too. Seattle’s light, weather, and architecture require specific experience. You want to see Craftsman interiors, dark-wood rooms, lake views, and gray-day exteriors handled well.
2. Drone Services Without an FAA Part 107 Certificate
Flying a drone commercially without a Part 107 certificate is illegal, and doing it in Seattle’s controlled airspace without LAANC authorization is worse. If a photographer offers aerials but can’t produce a certificate, walk away. The liability can land on you and your seller.
3. Turnaround Longer Than 48 Hours
When median days on market sits around two to three weeks, a photographer who takes four or five days to deliver is costing you exposure. Next-day delivery is the local standard. Anything slower should come with a very good reason.
4. Prices Far Below Market
A $75 to $100 full shoot in Seattle is a quality signal, and not a good one. At that price, the photographer is either inexperienced, rushing through jobs, outsourcing editing to the lowest bidder, or skipping insurance and licensing. Budget doesn’t have to mean bad, but rock-bottom pricing in an expensive metro almost always does.
5. No Written Contract or Licensing Terms
Real estate photos are licensed, not sold. The photographer typically retains copyright and grants you usage rights. Without a written agreement, you don’t know if you can use the images on social media, in print mailers, or if the buyer’s agent can reuse them later. A clear contract protects everyone.
6. JPEG-Only Delivery With No Backup
You don’t need RAW files yourself, but a professional should shoot in RAW and keep backups. That way, if you need a re-edit (a different sky, a removed car, a brighter version of the kitchen), they can produce it without a reshoot. A photographer who only shoots JPEG has limited editing latitude and no safety net.
7. No Flash or Off-Camera Lighting for Interiors
Window-light-only photography can look lovely in a bright Southern California home. In a Seattle bungalow in November, it often produces muddy, gray, color-shifted images. Ask directly whether the photographer uses flash, strobes, or a flambient technique. If the answer is “I prefer natural light,” look at their winter portfolio carefully before booking.
6 Questions to Ask Before You Book
A five-minute phone call can save you from a bad shoot. Use these questions, and pay as much attention to how confidently they’re answered as to the answers themselves.
| Question | What to Look For |
|---|---|
| “Can I see your portfolio of recent Seattle listings?” | Recent work from the past 6 to 12 months, full galleries rather than highlights, and properties similar to yours in style and price. |
| “What’s your turnaround time?” | Under 24 to 48 hours is standard in this market. Ask about rush options for same-day delivery. |
| “Do you have an FAA Part 107 certificate?” | Must be a clear yes if drone is offered, plus willingness to send proof and confirmation of drone liability insurance. |
| “What happens if the weather is bad on shoot day?” | A defined reschedule policy, an interior-first strategy, free exterior reshoots, or sky replacement included in editing. |
| “What does your licensing cover?” | MLS use, listing websites, social media, and print marketing should all be included for the agent and seller. |
| “Do you shoot with flash or ambient light only?” | Flash or flambient capability is essential for cloudy and low-light months. Ambient-only is a warning sign in Seattle. |
Use these six questions to vet any Seattle real estate photographer before booking.
Beyond those six, a few bonus questions are worth asking for bigger listings. Ask how many homes they shoot in a typical day (more than five or six usually means rushing), who does their editing (in-house or outsourced), and whether they carry general liability insurance in case something gets damaged during the shoot.
How to Prep Your Listing for Shoot Day
Even the best photographer can’t edit out a cluttered countertop without it looking fake. A little preparation makes a big difference.
- Clear kitchen counters except for one or two styled items, like a bowl of lemons or a cutting board.
- Remove personal photos, fridge magnets, toiletries, pet bowls, and trash cans.
- Replace burned-out bulbs and match color temperatures where possible (warm white throughout looks best).
- Open all blinds and curtains to the same height in every room.
- Make beds with crisp, neutral bedding and fluff the pillows.
- Move cars off the driveway and street in front of the house.
- Mow, edge, and clear moss and leaves from paths and decks.
- Turn off ceiling fans and TVs, and hide remote controls and cords.
Frequently Asked Questions (FAQ)
How much does a real estate photographer in Seattle cost?
Most Seattle real estate photographers charge $250 to $449 for a standard single-family listing with 30 to 50 edited photos. Budget packages start around $125, premium packages with drone and floor plans run $450 to $699, and luxury full-service shoots with Matterport and video range from $700 to $1,500 or more. Larger homes and Eastside travel can add to the base price.
How far in advance should I book a Seattle real estate photographer?
Book at least three to five days ahead for a standard shoot, and one to two weeks ahead during the spring market (March through June) or for twilight and luxury sessions. Thursday and Friday slots fill first because agents want photos ready for weekend launches. Many photographers can squeeze in next-day shoots during slower months, but don’t count on it in April.
Do I need drone photography for my Seattle listing?
Not always. Drone shots add the most value for homes on large lots, waterfront and view properties, homes near parks or the water, and anywhere location is a selling point, which describes much of the Eastside, Mercer Island, and Lake Washington shoreline. For a condo or a standard city lot in Ballard, a drone often adds little. Remember that much of Seattle proper sits in controlled airspace, so your photographer needs LAANC authorization to fly.
What’s the difference between a real estate photographer and an architectural photographer in Seattle?
Real estate photographers work fast, shoot many homes a week, and deliver marketing images within a day, usually at $250 to $700 per listing. Architectural photographers work for architects, builders, and design firms, spend a full day or more on a single project, light each frame meticulously, and charge $1,500 to $5,000 or more per day plus licensing. For most listings, a skilled real estate photographer is the right fit. For an architect-designed luxury home, some agents bring in an architectural specialist.
Does weather affect real estate photography sessions in Seattle?
Weather affects exteriors far more than interiors. Overcast skies actually produce soft, even interior light that many photographers prefer. For exteriors, experienced Seattle photographers use sky replacement, schedule return visits on clear days, or switch to twilight and virtual twilight images. Heavy rain is the main reason to reschedule, mostly because wet decks and puddles look unappealing.
How do I prepare my home for a real estate photography shoot?
Declutter every surface, remove personal items, turn on all lights, open blinds evenly, make beds neatly, and clear cars from the driveway. Outside, mow and tidy the yard, sweep paths, and clear leaves or moss. Plan to be out of the home during the shoot so the photographer can move quickly from room to room.
Is Matterport 3D worth it for Seattle listings?
For homes above roughly $900,000, and especially in Bellevue, Mercer Island, Kirkland, and Redmond, Matterport is usually worth it. Seattle has a large pool of relocating tech buyers who can’t tour in person, and 3D tours let them shortlist and even make offers remotely. For lower-priced condos and starter homes, a strong photo set and floor plan often deliver most of the value at a lower cost.
The Bottom Line for Seattle Agents and Sellers
Hiring the right real estate photographer in Seattle comes down to a few simple principles. Match the package to the price point, so a Fremont bungalow gets a polished mid-range shoot and a Medina estate gets the full-service treatment. Insist on flash lighting, quick turnaround, a real Seattle portfolio, and a Part 107 certificate for any drone work. Plan around the weather instead of fearing it, and use twilight and 3D tours where your buyer pool calls for them.
Your photos are the first showing every buyer attends. In a market where homes sell near full asking and the strongest listings go pending in days, that first showing has to be your best one. Spend a few hundred dollars wisely now, and it will come back to you at the closing table.