

How to Become a Real Estate Photographer: A Practical 2026 Guide
December 22, 2023 | by therealtyphotographer.com
How to Become a Real Estate Photographer: A Practical 2026 Guide
The Short Answer
To become a real estate photographer, learn interior shooting fundamentals (HDR, exposure blending, vertical correction), buy a wide-angle lens and full-frame camera, build a 10-image portfolio from vacant listings, register your business and get insurance, pitch local listing agents directly, and master a 24-hour Lightroom delivery workflow. Most new photographers land their first paid shoot within 60 to 90 days.
Is Real Estate Photography Worth Pursuing?
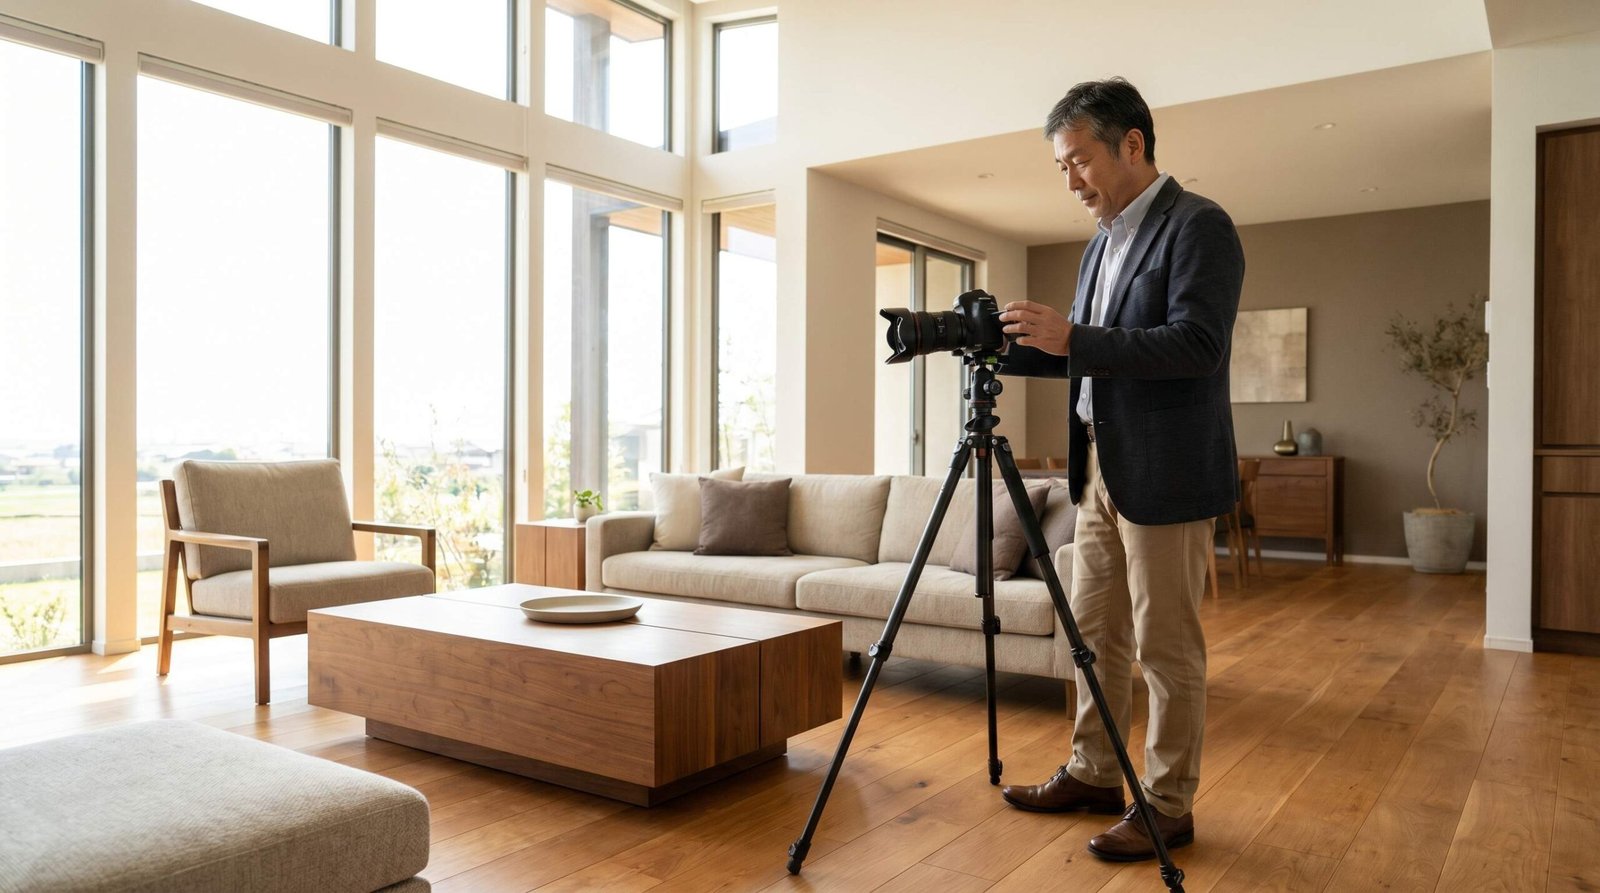
Short answer: yes, if you treat it like a business and not a hobby with a camera. Real estate photography pays well per hour worked, the technical bar is reachable in 90 days of focused practice, and demand stays consistent in most US markets as long as agents are listing homes.
That said, the version of the job that gets posted on Instagram is not the version you actually live. Here is what a typical workday looks like in practice.
What the Work Actually Involves
You wake up early because morning light on east-facing homes is gorgeous and listings need to be on the MLS by Friday. You drive to a 2,400 square foot property, walk through it once to plan your shot list, then spend 45 to 90 minutes shooting 25 to 40 final images. You bracket every interior frame (typically 3 to 5 exposures), pop a speedlight in dark corners, level your tripod for proper verticals, and chat with the homeowner who is hovering and asking if you can “make the kitchen look bigger.”
After the shoot you drive home, dump roughly 800 RAW files into Lightroom, cull aggressively, merge brackets, edit, and deliver within 24 hours. On a busy week you do this five to eight times. You also answer emails, send invoices, troubleshoot drone batteries, and occasionally reshoot a kitchen because the agent wanted the island staged differently.
Honest Pros and Cons
| Pros | Cons |
|---|---|
| Strong hourly rate once established ($150 to $300+ per hour on shoot day) | Income is lumpy: hot seasons are great, January and February can be brutal |
| Flexible schedule, you set your bookings | Agents need photos fast, which means weekend and last-minute requests |
| Low overhead compared to wedding or commercial photography | Physical demands: carrying gear, climbing stairs, hours on your feet |
| Technical skills compound, you get faster and better every shoot | Weather kills exterior shoots, twilight reshoots are common |
| Recurring revenue from agents who book monthly | Difficult homeowners, hoarded properties, and pets that follow you around |
Who Thrives vs. Who Burns Out
People who thrive in this work are detail-oriented, comfortable with brief client interactions, and good at running a one-person operation. They enjoy editing as much as shooting, because half the job happens at a desk.
People who burn out tend to be photographers who got into it because they “love photography” and treat the business side as an afterthought. They underprice, take every job that calls, and end up working 70-hour weeks for $40,000 a year. Real estate photography rewards systems thinking, not just artistic instinct.
How Much Do Real Estate Photographers Make?
Income varies wildly based on market, services offered, and how hard you hustle for clients. According to salary survey data across major job platforms, full-time real estate photographers in mid-size US markets typically earn between $52,000 and $95,000 per year, with premium specialists in coastal and luxury markets pulling $120,000 to $180,000+. Part-timers running it as a side hustle commonly net $15,000 to $35,000 on top of their main income.
| Tier | Volume | Avg. Per Listing | Annual Gross | Realistic Net (after expenses, taxes) |
|---|---|---|---|---|
| Part-time side hustle | 1-2 shoots/week (~75/year) | $250 | $18,750 | $13,000-$15,000 |
| Full-time generalist | 5-8 shoots/week (~325/year) | $295 | $95,875 | $62,000-$70,000 |
| Premium specialist (drone, 3D, twilight) | 4-6 shoots/week (~250/year) | $650 | $162,500 | $105,000-$125,000 |
| Multi-photographer studio | 15-30 shoots/week (1,000+/year) | $320 | $320,000+ | Owner draw $130,000-$220,000 |
Two caveats. First, your local market matters more than skill at the entry level. A great photographer in Boise charges $175 for a shoot that fetches $450 in San Diego. Second, the gap between gross and net is bigger than new photographers expect. Camera gear, drone replacement, insurance, software subscriptions, mileage, and self-employment tax eat 30 to 40 percent of revenue.
Step 1 , Learn the Fundamentals
Real estate photography is its own discipline. Wedding photographers and portrait shooters routinely struggle with it because the technical priorities flip: even, bright, color-accurate, and geometrically straight beats moody, shallow depth of field, and creative composition every time.
Core Technical Skills You Need
- HDR and exposure bracketing. Every interior has bright windows and shadowed corners. You shoot 3 to 7 bracketed exposures and blend them in post.
- Window pull technique. Agents want the view through the window visible, not blown white. This requires a flambient or manual blending approach.
- Flambient lighting. The dominant interior method right now: combine ambient HDR with off-camera flash to clean up color casts and lift shadows.
- Vertical line correction. Walls must be perfectly vertical in the final image. This starts with a leveled tripod and ends in Lightroom’s Transform panel.
- Interior composition rules. Shoot at chest height, point straight (no tilt), include three walls when possible, and lead the eye through doorways.
- White balance discipline. Tungsten lamps, daylight windows, and LED can lights produce three different color temperatures in one frame. Fixing this in post is non-negotiable.
Self-Teaching Resources Worth Your Time
YouTube channels we suggest watching cover-to-cover: Mike Kelley (Where Art Meets Architecture), Rich Baum Photography, and Nathan Cool Photo. These three have collectively taught more working real estate photographers than any paid course on the market. For lighting specifically, Scott Hargis Photography’s older tutorials are still the gold standard.
If you prefer paid structured learning, look at PhotographyForRealEstate.net for technique courses and Rich Baum’s flambient workshops for advanced lighting.
When You’re Ready to Charge
You are ready to take paid work when:
- Every interior frame in your portfolio has vertical walls, accurate color, and visible window views without highlight clipping.
- You can shoot a 2,000 sq ft home in under 90 minutes and edit it in under 90 minutes.
- Your portfolio of 15 to 20 images would not look out of place on a Compass or Sotheby’s listing.
- You can articulate why your photos look the way they do (lighting choices, lens choice, edit approach).
If you cannot honestly check all four, keep practicing. Charging too early creates bad reviews and missed referrals you cannot afford in year one.
Step 2 , Get the Right Equipment
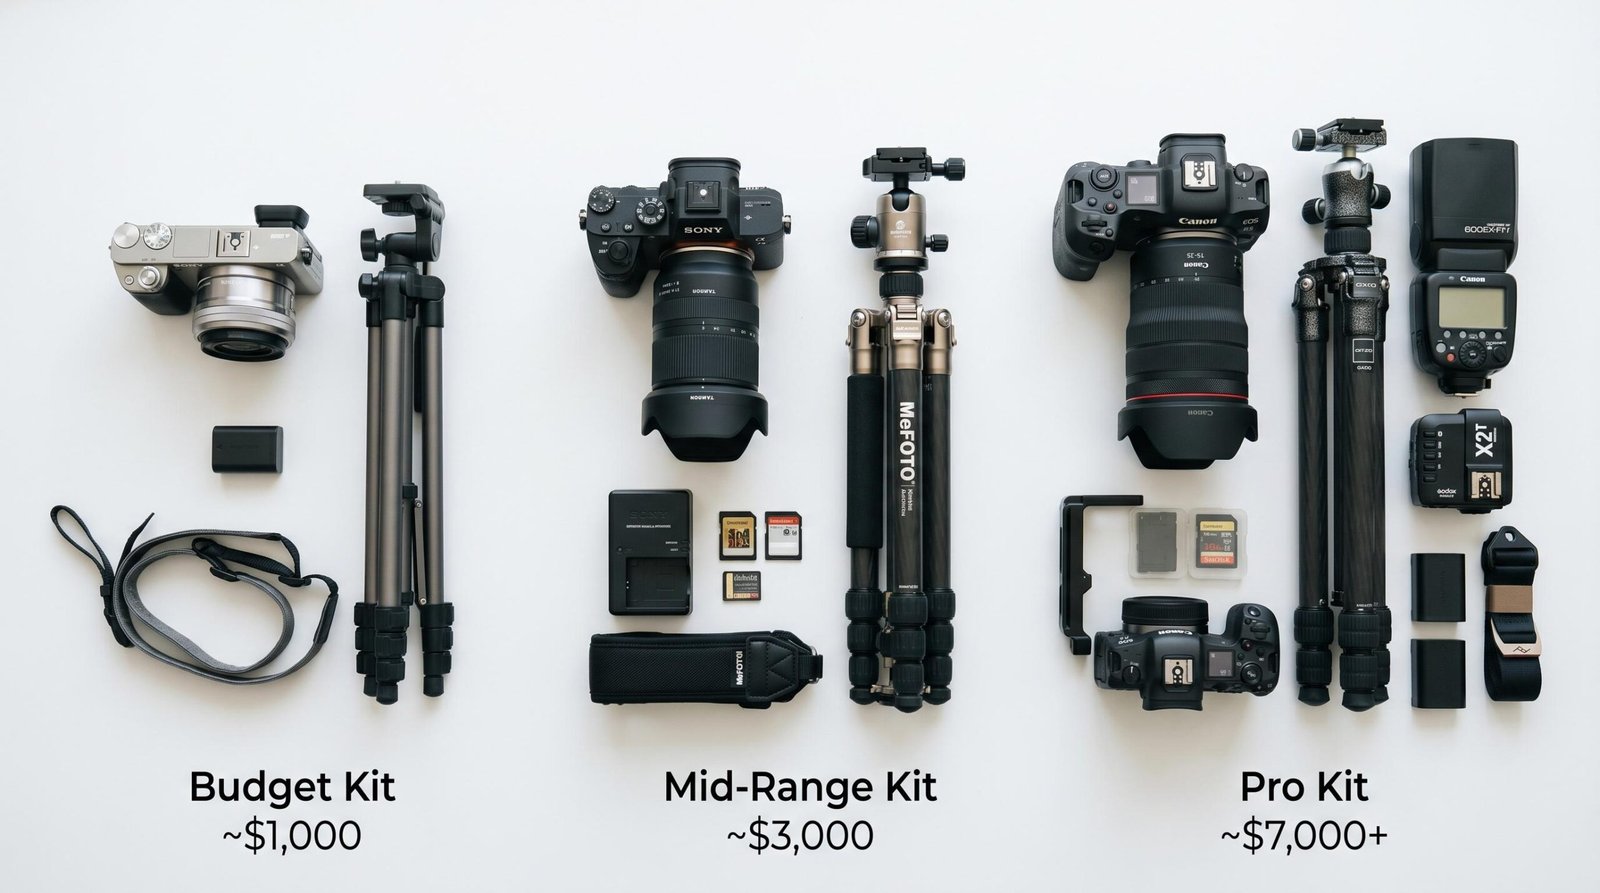
You do not need expensive gear to start. You need the right gear. A used Sony A7 II with a Tamron 17-28mm beats a brand-new Sony A1 with a kit lens every day of the week for this specific job. Here is how the tiers compare.
| Component | Budget Starter ($800-$1,200) | Mid-Range Working Kit ($2,500-$4,000) | Full Professional Kit ($7,000+) |
|---|---|---|---|
| Camera body | Used Sony A7 II or Canon 6D | Sony A7 III, Canon R6, or Nikon Z6 II | Sony A7R V, Canon R5, or Nikon Z8 |
| Wide-angle lens | Rokinon 14mm f/2.8 or used Canon 17-40mm | Tamron 17-28mm or Sony 16-35mm f/4 | Canon RF 14-35mm f/4 L or Sony 16-35mm f/2.8 GM |
| Flash/lighting | Godox TT685 + remote trigger | Two Godox V860III speedlights + Xpro trigger | Three speedlights, Godox AD200 strobe for big rooms |
| Tripod | Manfrotto Compact Action | Manfrotto 055XPRO3 + geared head | Really Right Stuff TVC-33 + geared head + leveling base |
| Software | Lightroom Classic ($10/mo) | Lightroom + Photoshop + Enfuse plugin | Adobe CC + Lumenzia + Topaz Photo AI + cloud delivery platform |
The single non-negotiable purchase is a quality wide-angle lens. Real estate interiors live and die at 14mm to 24mm on full frame (or 10-18mm on crop sensor). A wide-angle prime or a 16-35mm zoom should be the first thing you buy after the camera body. Everything else can be upgraded later.
For a deeper breakdown of body and lens choices, sample shots from each kit, and current pricing, see our real estate photography equipment guide.
Step 3 , Build Your Portfolio Without Clients
The chicken-and-egg problem: you need a portfolio to get clients, but you need clients to build a portfolio. The solution is to create the portfolio yourself, before anyone hires you.
Free Shooting Opportunities
- Your own home. Start here. Shoot every room. Learn your gear and your editing workflow in a low-pressure environment.
- Friends and family. Anyone with a clean, well-staged home is fair game. Offer them free prints in exchange for shooting their space.
- Vacant listings. Call local listing agents directly and offer to photograph their vacant listings for free in exchange for credit and the right to use the images in your portfolio. Vacant properties have no homeowner to schedule around, no clutter to work around, and no liability concerns.
- Short-term rentals. Reach out to Airbnb hosts in your area. Many have outdated photos and will let you shoot in exchange for the images.
- Open houses. Some listing agents will let you shoot during their open house if you stay out of the way. Bring business cards.
What Agents Look for in a Portfolio
Agents do not care about your artistic vision. They care about three things, in order:
- Bright interiors with accurate color. Rooms should look inviting and clearly lit. No yellow tungsten cast, no green fluorescent cast, no muddy shadows.
- Visible window views without blown highlights. The pool, the ocean, the backyard, the garden, whatever is outside the window should be clearly visible.
- Perfectly vertical walls. Tilted verticals scream “amateur” to any agent who has seen quality work.
Build at least 10 strong portfolio images before you pitch anyone. We suggest 15 to 20. Mix kitchens, living rooms, bedrooms, bathrooms, and at least one exterior with twilight or blue-hour treatment if possible.
Step 4 , Set Up Your Real Estate Photography Business
This step separates hobbyists from professionals. The legal and operational scaffolding takes a weekend to set up and saves you from disasters later.
Business Structure: LLC vs. Sole Proprietorship
We suggest forming an LLC for liability protection. Real estate photography involves entering people’s homes, climbing ladders, flying drones, and occasionally damaging property. A sole proprietorship leaves your personal assets exposed. An LLC creates a legal wall between your business and your personal finances. You can register your business as an LLC through the Small Business Administration’s guide; most states charge $50 to $300 in filing fees plus an annual report.
Banking and Accounting
Open a dedicated business checking account the same week you register. Never run business expenses through personal accounts. Use accounting software like Wave (free) or QuickBooks Self-Employed from day one. Send invoices through HoneyBook, Pixifi, or Sprout Studio so they look professional and track payment automatically.
Contracts: Why You Need One
Verbal agreements are how new photographers lose money. Every shoot needs a signed contract covering:
- Scope and deliverables. Number of final images, services included, square footage covered.
- Usage rights. Agents get a license to use images for marketing the specific listing, not blanket commercial rights. You retain copyright.
- Cancellation policy. 24-hour cancellation fee of 50 percent, no-show fee of 100 percent.
- Weather and reshoot policy. Who pays for a reshoot if weather kills the exterior shots.
- Turnaround time. Standard 24 to 48 hours, rush available for an upcharge.
- Payment terms. Net 7 or pay-on-delivery; late fees after 14 days.
Insurance
Two policies you actually need: general liability ($1 million minimum) and equipment coverage that follows your gear out of the house. Some homeowners’ policies do not cover business equipment, so verify before assuming you are protected. Carriers that offer specialist photography insurance understand the specific risks of property photography and tend to write better policies than general small-business carriers.
Pricing
Two pricing models dominate: per-image and per-property package. Per-image pricing punishes you for efficient shoots and rewards properties with more rooms. Per-property package pricing scales with square footage and is what we suggest using.
| Listing Size | Base Photo Package (Small Market) | Base Photo Package (Mid Market) | Base Photo Package (Luxury/Coastal) |
|---|---|---|---|
| Under 1,500 sq ft | $150-$200 | $225-$300 | $400-$550 |
| 1,500-2,500 sq ft (typical) | $200-$275 | $295-$395 | $500-$750 |
| 2,500-4,000 sq ft | $275-$400 | $425-$575 | $750-$1,200 |
| 4,000+ sq ft | $400-$600+ | $595-$895+ | $1,200-$2,500+ |
Add-ons typically run separately: drone exteriors $125-$200, twilight $150-$250, video walkthrough $250-$500, 3D Matterport $200-$400. Start at the low end of your market range and raise rates every six months as your portfolio and reviews grow.
Step 5 , Get Your First Real Estate Photography Clients
The first five clients are the hardest. After that, referrals do most of the work if you deliver consistently.
Cold Outreach to Listing Agents
Do not send a template. Pick 20 agents in your area who have at least three active listings, look at their existing photos critically, and reach out with a specific observation. Something like: “Hi Sarah, I saw your listing at 412 Oak Street. The interior shots are great but the exterior twilight could really sell the curb appeal. I am building my portfolio and would love to shoot your next listing at 50 percent off, with full rights for you to use the images however you want.”
That email gets answered. Generic “I am a photographer offering services” emails get deleted in two seconds.
Realtor Association Events
Your local Board of Realtors or MLS holds monthly events, coffees, and continuing education classes. Find them, attend them, and hand out business cards. Most agents have never met their photographer in person. Being a real human with a face beats a website every time.
Introductory Pricing
Offer your first five paying clients a 30 to 50 percent introductory discount in exchange for a Google review and permission to use the images. This is not “working for free.” It is buying social proof that turns into referrals.
Google Business Profile
Set up a Google Business Profile the day you register your LLC. Optimize for “real estate photographer [your city]” and adjacent cities. Get reviews from every satisfied client. This is the single highest-ROI marketing channel for local service businesses, and most photographers neglect it.
Brokerages vs. Individual Agents
Individual agents book more loyally and pay faster, but they shoot less volume. Brokerage-level relationships (Compass teams, Coldwell Banker offices, boutique luxury brokerages) book higher volume but expect lower per-shoot rates and faster turnaround. Most established photographers run a mix: 60 to 70 percent individual agents for margin, 30 to 40 percent brokerage volume for baseline revenue.
Step 6 , Master Your Post-Processing Workflow
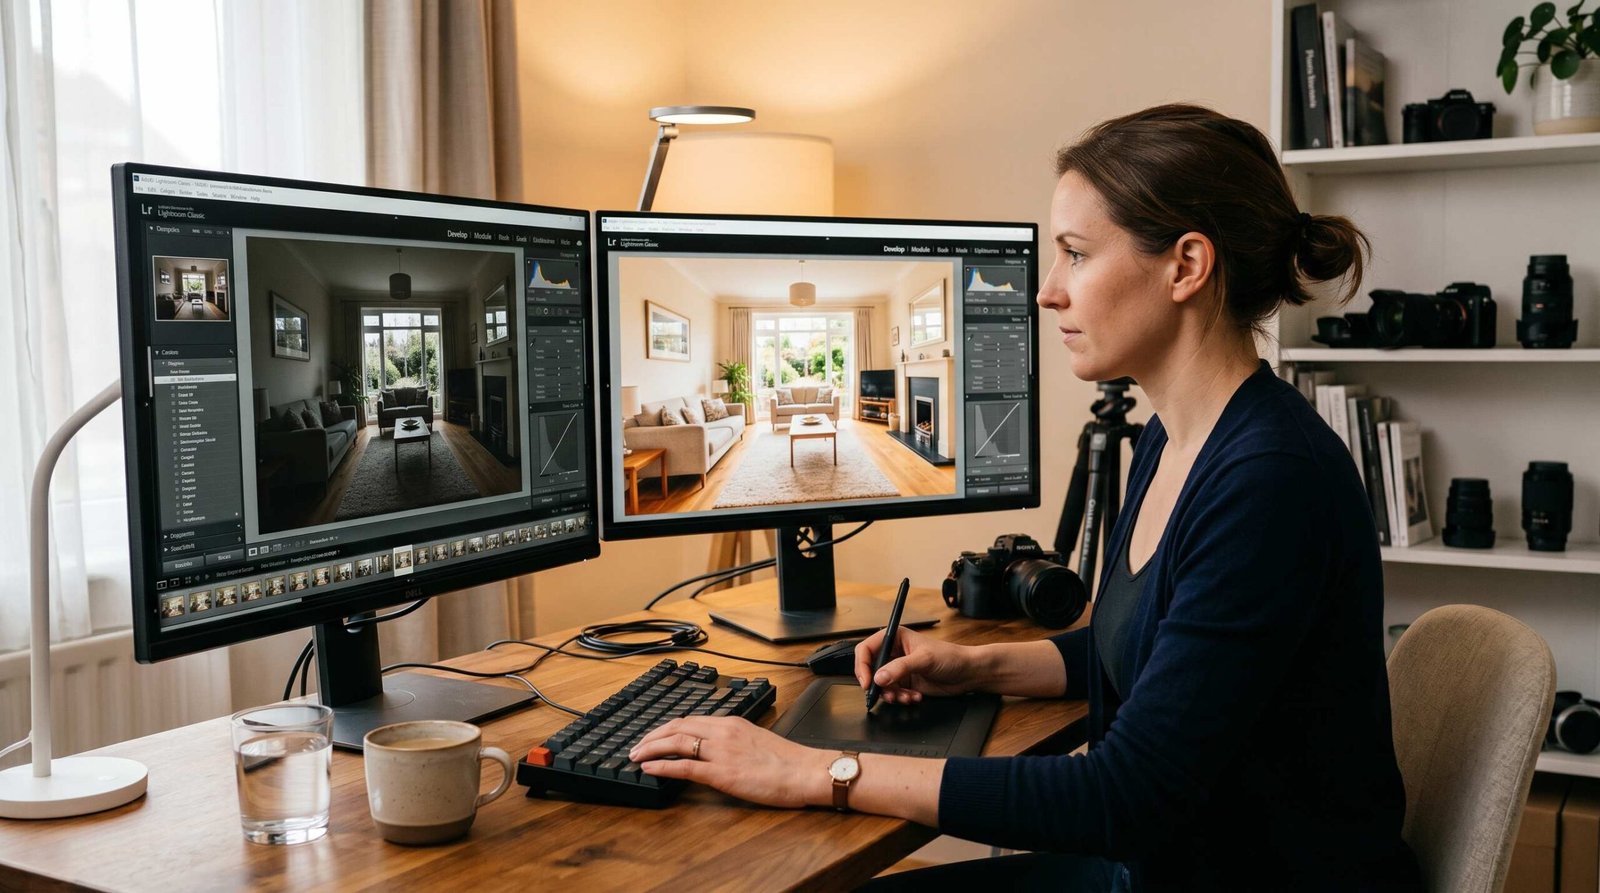
This is the section every other guide skips, which is why so many new photographers spend four hours editing what should take 45 minutes. Speed in post is the difference between a sustainable business and a treadmill.
The Lightroom Workflow
- Import. Use a consistent folder structure: Year/Month/PropertyAddress. Apply a real estate import preset that sets baseline white balance, lens corrections, and noise reduction on import.
- Cull aggressively. Mark picks with P (only your best frame from each bracketed sequence). Reject everything else. Your goal is 25 to 40 final images from 500 to 1,000 captured frames.
- HDR merge. Select your bracketed sets in groups of 3 to 7, then Photo > Photo Merge > HDR. Lightroom’s auto-align is solid; just verify the merged DNG file looks natural before moving on.
- Global adjustments. White balance, exposure, contrast, highlights, shadows. Aim for bright, neutral, slightly warm interiors. The Tone Curve panel is more efficient than the basic sliders for setting overall brightness.
- Local adjustments. Use radial filters to add light to dark corners, brush adjustments to fix specific window pulls, and the spot removal tool to clean up outlets, light switches, and small distractions.
- Vertical correction. The Transform panel’s Guided Upright tool is your best friend. Draw two vertical reference lines, two horizontal if needed, and Lightroom corrects everything.
- Sky replacement when needed. Overcast exterior days are saved with Photoshop’s Sky Replacement feature or Luminar Neo. Use sparingly; a wildly unrealistic sky kills credibility.
- Export. Web-optimized JPEGs at 2048px on the long edge, sRGB color space, 80 quality, no metadata stripping. Most MLS systems prefer this exact spec.
Turnaround Time Standards
The industry norm is 24 to 48 hours from shoot to delivery. Faster turnaround (12 hours or same-day) is a legitimate premium service that commands an upcharge of 25 to 50 percent. Going beyond 48 hours puts you in danger of losing the agent’s next booking.
Outsourcing Editing at Scale
Once you hit 15+ shoots per week, your bottleneck is editing time, not shoot time. Outsourced editing services like PixelRooms, Phixer, BoxBrownie, and PhotoUp turn around edits in 12 to 24 hours at $1 to $4 per image. The math: if you charge $40 per final image and pay $3 to outsource, you net $37 per image at zero editing hours. That is how multi-photographer studios scale.
The catch: outsourced edits never quite match your own style. Most photographers who use outsourcing edit a sample property to spec, send it to the service as a style reference, and request the editor honor that look on every subsequent job.
File Delivery
Stop emailing 500MB zip files. Use a dedicated delivery portal: Dropbox, Smugmug, ShootProof, Aryeo, or HD Photo Hub. Agents want to log in, view thumbnails, and download both web-sized and full-resolution versions. Bonus points if the portal supports MLS-format export, branded landing pages, and embedded virtual tours.
Step 7 , Level Up: Add Premium Services
Once you have 6 to 12 months of consistent bookings, your margins improve dramatically by adding premium services that you can upsell to existing clients without finding new ones.
Drone Photography and FAA Part 107
Aerial exteriors are now expected on properties over $500,000 and on any home with significant land or a view. To fly commercially you must hold an FAA Part 107 Remote Pilot Certificate. The test costs $175, requires roughly 15 to 20 hours of study, and is renewable every 24 months via free online recurrent training. Add a DJI Mavic 3 or Air 3 to your kit ($1,500 to $2,500) and charge $125 to $250 per property for aerial coverage.
Matterport 3D Virtual Tours
Matterport tours let buyers walk through a property remotely. They are now standard on luxury listings and increasingly common on mid-market homes. A Matterport Pro3 camera runs $5,995 but pays for itself in 30 to 50 shoots. Service rates run $200 to $500 per property depending on size. For setup details and pricing models, Matterport’s real estate photography guide walks through how working photographers integrate 3D capture into their service menu.
Twilight Photography
Twilight exteriors (dusk shots with warm interior lights glowing through windows) are the highest-margin add-on in the business. You shoot for 30 to 60 minutes, edit two to four hero images, and charge $150 to $300. Some markets pay $400+ for true twilight on luxury homes.
Virtual Staging
For vacant properties, virtual staging companies render furnished versions of empty rooms for $25 to $60 per image. You upsell the service to your agent at $75 to $125 per image and pocket the spread. No additional shooting required.
Video Walkthroughs
Short property videos (60 to 90 seconds, with cinematic music and on-screen text) sell well at $300 to $700 per property. They require gimbal stabilization, additional editing skills, and roughly twice the on-site time of a photo shoot. Worth adding once your photo business is stable.
How Long Does It Take to Become a Real Estate Photographer?
Realistic timelines depend on how many hours per week you can dedicate and whether you already own a camera. Here is what we see most often.
| Milestone | From Zero to First Paid Shoot | Full-Time Income Replacement | Premium Specialist |
|---|---|---|---|
| Skill development | 30-60 days of focused practice | 6-12 months of consistent shooting | 18-36 months including drone, 3D, video |
| Portfolio building | 15-30 days, 10-15 images | Ongoing; 50+ properties shot | 100+ properties, multiple service categories |
| Business setup | 1-2 weekends (LLC, insurance, contracts) | Already complete | S-corp election, subcontractor agreements |
| First client | 60-90 days from starting | Established client base of 15-30 active agents | Brokerage contracts, luxury market positioning |
| Income target | $200-$500/month in first 3 months | $60,000-$85,000/year by month 18-24 | $120,000+/year by year 3-4 |
Two patterns hold across almost every photographer we have tracked. First, the people who treat the first 90 days as a full part-time job (15 to 20 hours per week) hit paid work by month three. The people who treat it as a hobby take a year. Second, the gap between $50,000 and $100,000 is closed by pricing and premium services, not by shooting more volume. The photographers who scale revenue without burning out add drone, 3D, and twilight before they add hours.
Frequently Asked Questions
Do you need a degree to become a real estate photographer?
No. Real estate photography is a skill-based, results-based business. Agents care about portfolio quality and reliability, not credentials. Most successful real estate photographers are self-taught from YouTube tutorials and books. The only certification that matters in this field is the FAA Part 107 license if you plan to offer drone photography.
What camera do most real estate photographers use?
Full-frame mirrorless cameras dominate the field in 2026. The Sony A7 III, Sony A7 IV, Canon R6 Mark II, and Nikon Z6 II are the most common working cameras at the mid-tier level. At the higher end, the Sony A7R V, Canon R5 Mark II, and Nikon Z8 are popular for photographers shooting luxury markets where high-resolution files matter. Crop-sensor cameras work fine for budget starter kits but most professionals upgrade to full-frame within their first year.
How long does a real estate photography shoot take?
On-site shoot time runs 45 to 90 minutes for a typical 2,000 to 3,000 square foot home. Luxury properties, large estates, or homes with extensive grounds can take 2 to 4 hours. Add editing time of 60 to 120 minutes per property, plus travel time. Total time per shoot from arrival to final delivery typically runs 3 to 5 hours of actual work.
How much should I charge for my first real estate photography shoot?
For your first five paying clients, we suggest charging 30 to 50 percent below the market rate in your area. In a mid-size US market that means roughly $125 to $175 for a 2,000 square foot property. This positions you as a value option while you build social proof through reviews and referrals. Raise your prices to full market rate after your first 5 to 10 successful shoots and Google reviews.
Is real estate photography a good business to start?
Yes, for the right person. It has low startup costs ($1,500 to $4,000 for a working kit), strong hourly rates once established, recurring revenue from agent clients, and clear paths to scale through premium services. It is a poor fit for people who dislike running a business, struggle with consistent client communication, or want highly creative work. The technical work is methodical, not artistic, and the business side is roughly 50 percent of the job.
Can you do real estate photography part-time?
Yes, and many photographers do exactly this. Part-time real estate photography is one of the better photography side hustles because shoots are scheduled in advance, take 3 to 5 hours total, and pay well per hour. A part-time photographer doing one to two shoots per week typically nets $15,000 to $30,000 per year on top of their main income. Most agents shoot during business hours, so plan for some flexibility from your day job, but evening editing and weekend exterior shoots work fine.
RELATED POSTS
View all

 Photo by Martin Sanchez on Unsplash
 Becoming a Professional Real Estate Photographer: Tips, Techniques, and Resources
December 22, 2023 | by therealtyphotographer.com
Becoming a Professional Real Estate Photographer: A Comprehensive Guide
December 22, 2023 | by therealtyphotographer.com
A Comprehensive Guide to Becoming a Professional Real Estate Photographer
December 22, 2023 | by therealtyphotographer.com