Twilight Real Estate Photography: The Complete 2026 Guide
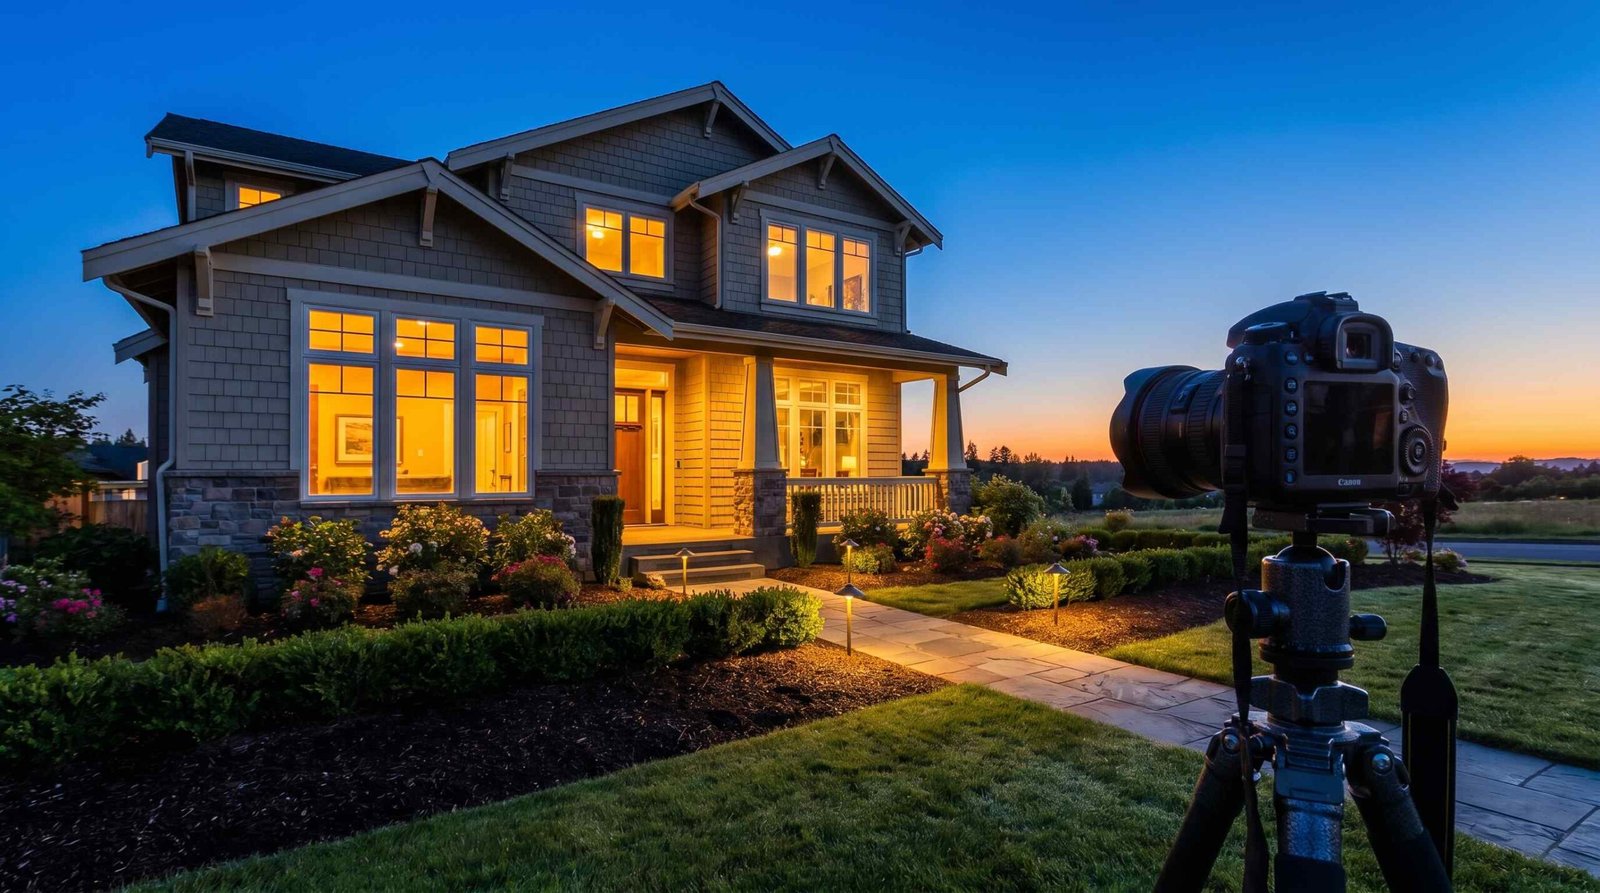
Twilight real estate photography is the practice of shooting a property during the brief 20 to 40 minute window just after sunset (or just before sunrise) when the sky glows deep blue and purple while interior lights cast a warm amber glow through the windows. The result is a dramatic, magazine-quality image that makes a listing stand out in crowded MLS feeds, social media scrolls, and printed marketing collateral.
Why Twilight Photos Move Properties Faster
Twilight shots do something daytime photos cannot. They turn an ordinary house into a glowing, cinematic destination. Warm interior light spilling onto manicured landscaping, a pool lit from below, garage lanterns burning against a cobalt sky. Buyers stop scrolling. They click. They book showings.
The data backs this up. Redfin research found that listings featuring professional photography sold faster and commanded measurable price premiums over comparable homes shot with amateur images. Twilight photography sits at the premium end of that spectrum, used by top-producing agents and luxury brokerages to give million-dollar listings the high-end treatment buyers expect.
Agents have noticed. According to NAR data, agents continue to raise their photography and video budgets as buyers do more of their initial home shopping online. The first impression is now a thumbnail on a phone, and a glowing twilight exterior is one of the highest-converting thumbnails available.
For photographers, twilight shoots are also a margin play. A standard daytime gallery might fetch $200 to $400. Adding a single twilight image typically commands $150 to $300 on top of that, for less than an hour of additional shooting time. Stack a few twilight bookings into your monthly schedule and the revenue line moves noticeably without adding new clients to your pipeline.
Real Twilight vs. Virtual Twilight: Which Should You Use?
This is the question every photographer and agent eventually faces. Should you actually shoot during the blue hour, or have an editor convert a daytime image into a faux twilight scene? Both have their place. Neither is universally better.
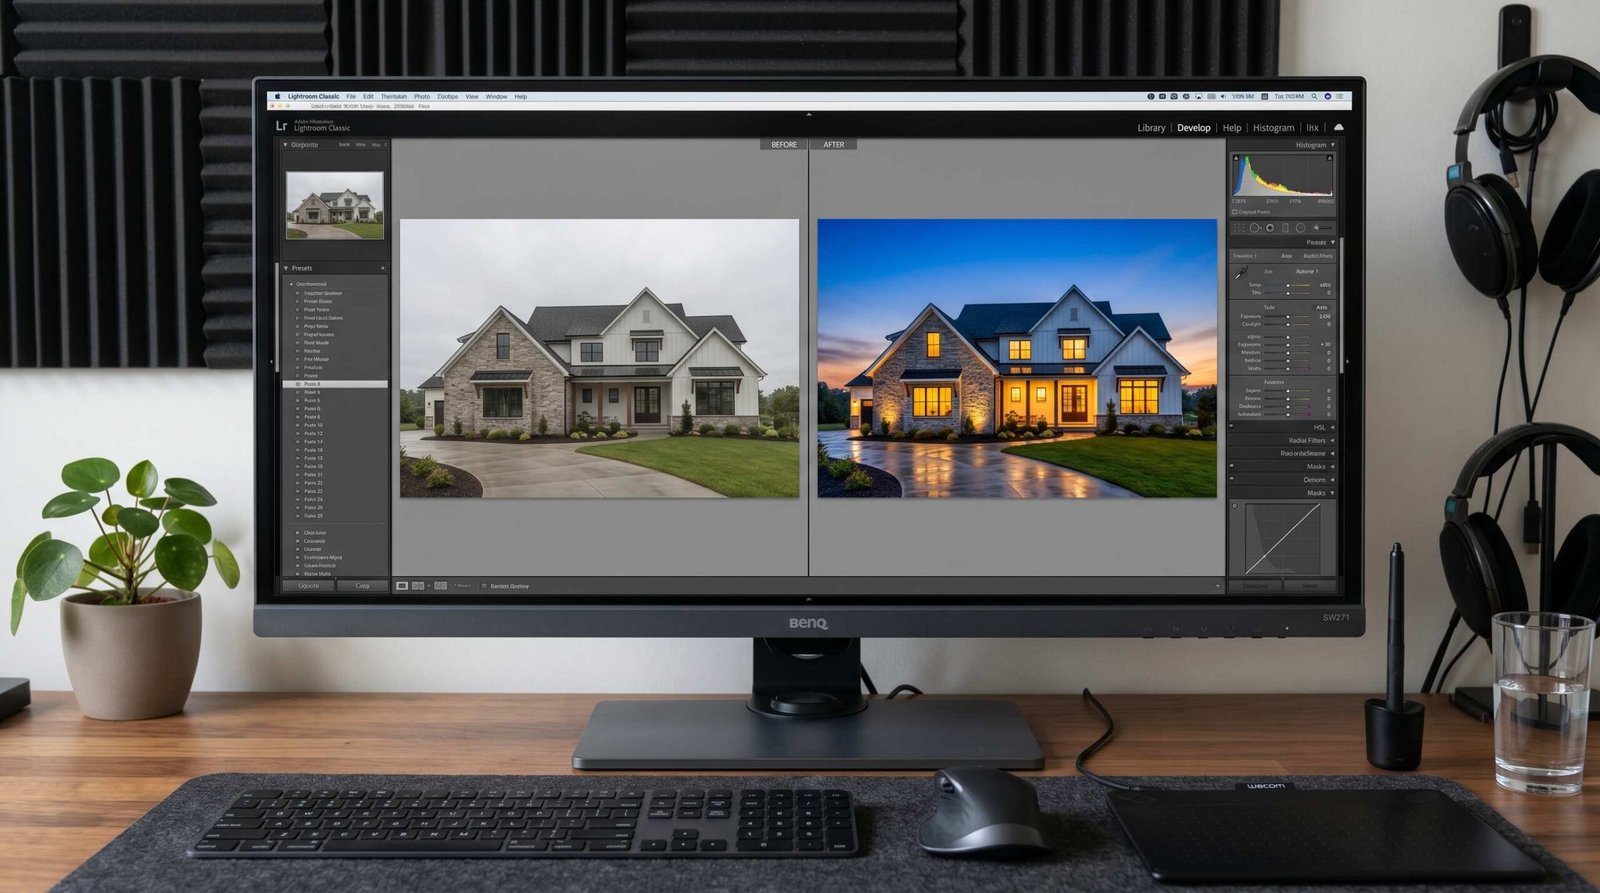
Real twilight photography captures genuine ambient sky color and the natural interplay between fading daylight and interior light. Virtual twilight (sometimes called “twilight conversion”) is a Photoshop process where an editor replaces the sky, warms the windows, adds glow to lights, and stylizes a daytime shot to mimic the look of dusk.
| Factor | Real Twilight Shoot | Virtual Twilight Edit |
|---|---|---|
| Shooting time required | 20 to 40 minute window, must be on-site at sunset | Captured during normal daytime shoot, no extra trip |
| Authenticity | Real ambient light, real reflections, real window glow | Stylized look, can appear obviously edited if overdone |
| Typical cost to client | $150 to $400 add-on | $30 to $75 per image |
| Weather dependency | High, overcast or rain can ruin a session | None, editor picks any sky |
| Scheduling complexity | Requires second visit, narrow window | Same-day delivery possible |
| Best for | Luxury listings, hero shots, pools, properties with great architecture | Budget listings, time-pressed sellers, rainy-day rescues |
| Visual quality ceiling | Higher, real light has nuance editors cannot fabricate | Good to very good, but trained eyes can spot the edit |
| Turnaround time | 24 to 48 hours after the shoot | 12 to 24 hours from daytime gallery |
Our take after years of doing both. Real twilight is the right call for any listing above $750K, for any property with strong architectural lines or water features, and for any agent who wants the hero image of their marketing campaign. Virtual twilight is the right call when weather will not cooperate, when the listing is mid-market and budget-conscious, or when the property faces the wrong direction for a clean sky shot.
Virtual Twilight Services and Pricing
If you outsource virtual twilight conversions rather than doing them in-house, several established services handle the editing at predictable per-image rates. We use these as backup options when a real shoot is not possible, and we pass the cost through to clients with a small markup.
BoxBrownie is the industry standard for mid-market work. Pricing runs $4 to $9 per image with a 24 to 48 hour turnaround. Quality is consistent and the editors handle window glow, sky swap, and exterior light enhancement in a single pass. PhotoUp offers similar work at $3 to $8 per image with subscription plans that drive the price down further if you shoot high volume. Their batch discounts make them attractive for photographers running ten or more virtual twilight conversions per month.
AI-powered tools like Virtual Staging AI sit at the budget end. Pricing is typically $1 to $3 per image with near-instant turnaround. Quality is less consistent, with occasional artifacts around tree edges and complex rooflines. They work fine for lower-budget listings where the alternative is no twilight image at all. We do not use them for luxury work.
When to suggest virtual to clients: the listing needs twilight appeal but the schedule does not allow a real shoot. Tenants are still occupying the property and a second visit is awkward. The listing goes live tomorrow and weather is uncooperative. The seller wants twilight but the budget will not stretch to a dedicated session. In all of those cases, a virtual conversion gets the marketing impact without the logistical cost.
| Service | Price Per Image | Turnaround | Best For |
|---|---|---|---|
| BoxBrownie | $4 to $9 | 24 to 48 hours | Mid-market listings, consistent quality |
| PhotoUp | $3 to $8 | 24 to 48 hours | High-volume photographers, subscription pricing |
| Virtual Staging AI | $1 to $3 | Minutes to hours | Budget listings, fast turnaround |
| In-house editor (your own) | $15 to $40 (labor) | 2 to 24 hours | Premium control, brand consistency |
The Shooting Window: Timing Your Twilight Session
The “blue hour” is shorter than its name suggests. The usable shooting window for real estate twilight typically lasts 20 to 40 minutes, starting roughly 10 minutes after the sun drops below the horizon and ending when the sky goes fully black.
The sweet spot is when the sky’s brightness roughly matches the brightness of the interior lights showing through the windows. Too early, the sky is too bright and the windows look dim. Too late, the sky goes inky black and the contrast crashes. You want that brief moment when both balance.
Arrive 60 to 90 minutes before sunset. That sounds excessive. It is not. You need time to scout angles, set up multiple tripod positions, turn on every interior light, open every blind, and pre-frame your shots while you can still see. The actual shooting window is short. The setup is everything.
Check the weather two days out and again the morning of the shoot. Light cloud cover can actually help by adding texture to the sky. Heavy overcast kills the gradient. Rain ends the session.
One more timing tip. Sunset twilight is more popular and more practical, but sunrise twilight (the 30 minutes before the sun comes up) often gives cleaner skies with less atmospheric haze. Hardly anyone shoots it because of the early call time, which means your sunrise twilight images will stand out.
Blue Hour vs. Golden Hour: Know the Difference
Photographers mix these terms up constantly, and the confusion shows up in mistimed shoots. They are not the same window, and only one produces the signature twilight look real estate buyers respond to.
Golden hour is the period just before sunset and just after sunrise, when the sun is low on the horizon and casts warm, directional, amber light across the landscape. The sky stays bright. Shadows stretch long. Colors lean orange and gold. This is excellent for portrait photographers and landscape work, but it is the wrong window for real estate twilight. Interior lights look weak against a still-bright sky, and the warm exterior light fights the warm window glow rather than contrasting against a cool sky.
Blue hour is the 20 to 40 minute stretch after sunset (or before sunrise), when the sun has dropped below the horizon and the sky takes on deep blue, indigo, and purple tones. The sky is dim enough to balance against interior lighting, but bright enough to hold visible color and detail. This is the only window that produces the sky-interior light balance that defines great twilight real estate work.
Practical clock guidance: start shooting roughly 15 minutes after official sunset for sunset twilight. For sunrise twilight, start shooting about 40 minutes before official sunrise and shut down 10 minutes before the sun breaks the horizon. Have 2 to 3 compositions framed and locked before you arrive in the blue hour window. Once the light starts changing, you cannot afford to be scouting angles.
Essential Equipment for Twilight Real Estate Photography
Twilight work demands more from your gear than a standard daytime shoot. You need stability for long exposures, dynamic range for high-contrast scenes, and supplemental light for the foreground. Here is what actually earns space in our kit.
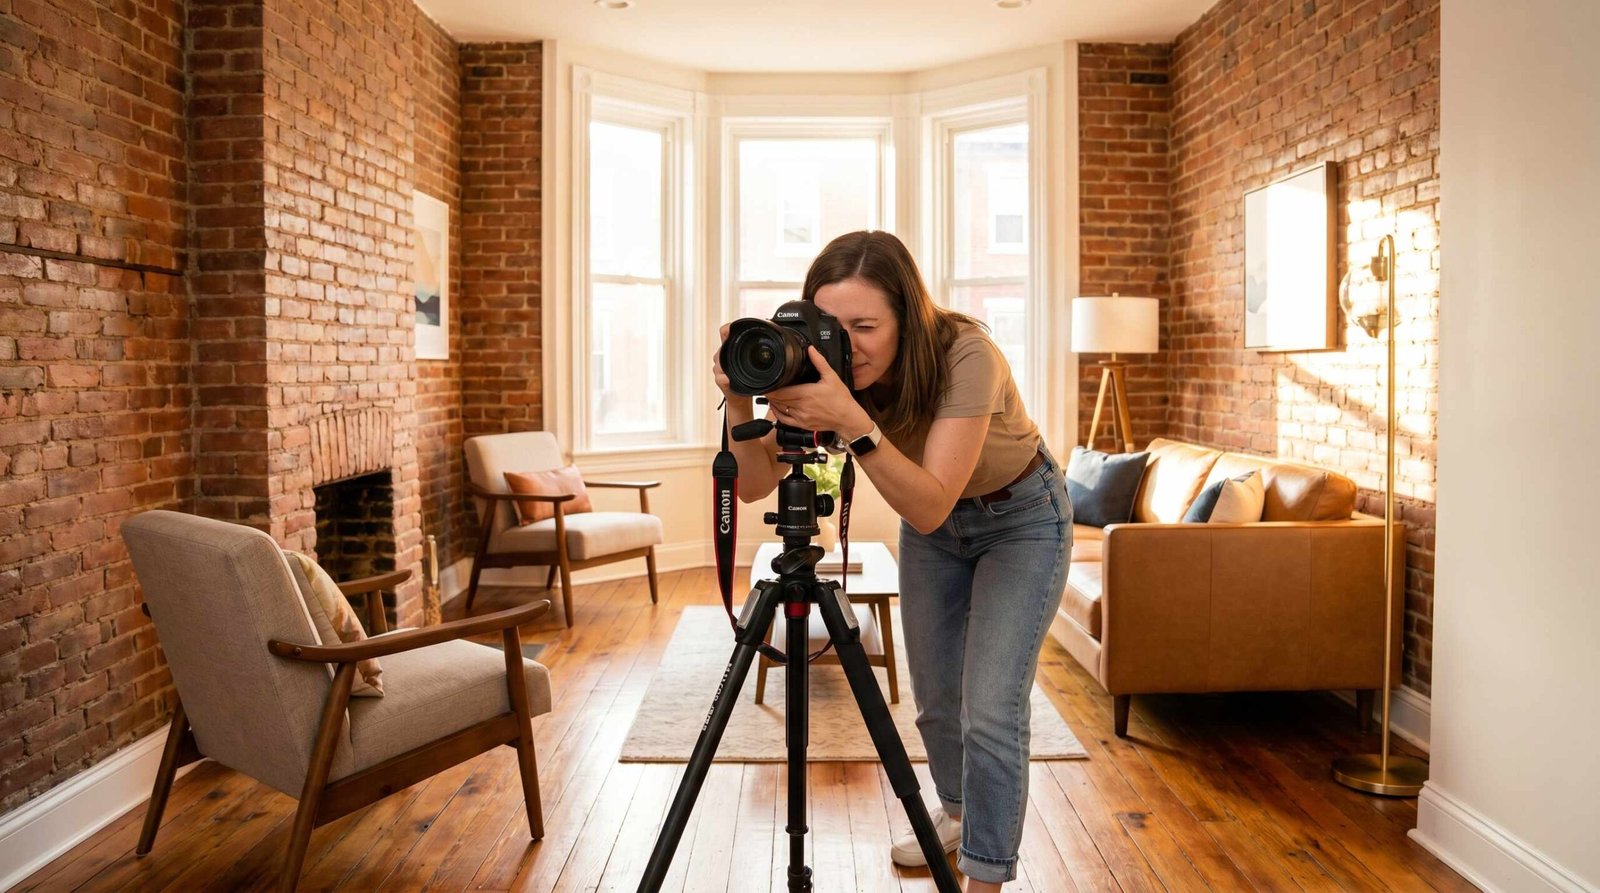
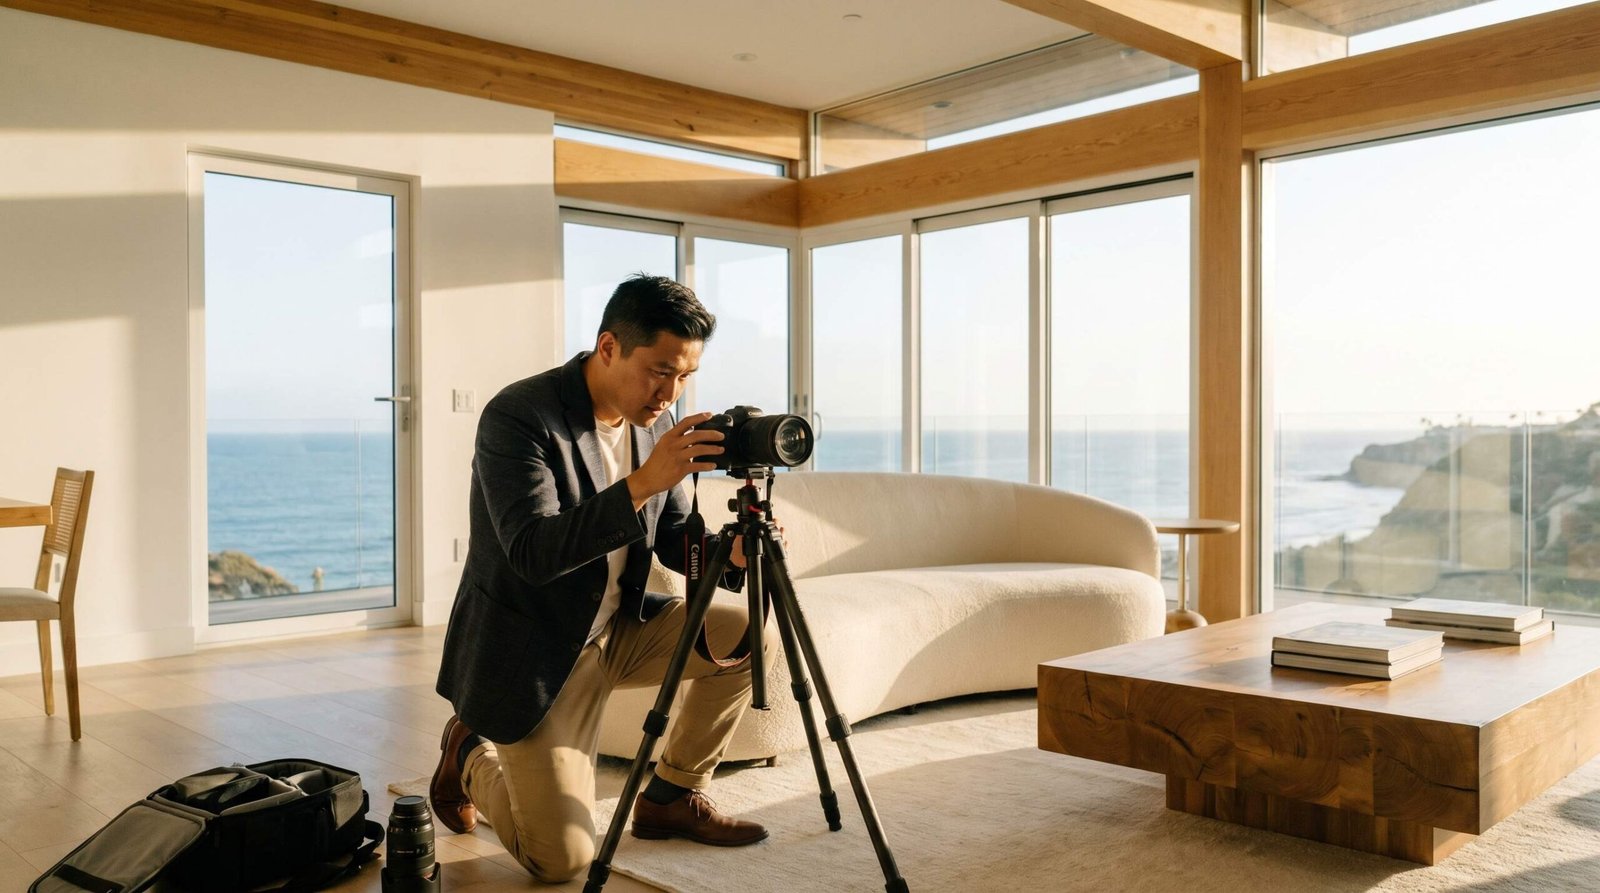
Camera and Tripod Setup
A full-frame mirrorless or DSLR is the baseline. The larger sensor pulls more detail from the shadows and handles high ISO with less noise, both critical when light fades. Crop-sensor bodies can work, but you will fight noise harder in post.
The wide-angle lens does the heavy lifting. A 16-35mm zoom or a 17mm tilt-shift covers almost every twilight exterior scenario. Avoid going wider than 14mm. Extreme wide angles distort vertical lines and make houses look cartoonish.
The tripod is non-negotiable. We use a carbon-fiber tripod with a geared head for fine-tuning composition without bumping the camera. A remote shutter release (or your camera’s 2-second self-timer) prevents vibration during long exposures. For a deeper look at the rest of the gear stack, see our complete guide to real estate photography equipment.
Lighting Gear for Exterior Twilight Work
This is where most photographers underbuild their twilight kit. The interior lights coming through the windows handle the warm glow, but the foreground (driveway, walkway, landscaping, front door) often falls into shadow. You need supplemental light to bring it up.
A speedlight or two on light stands, fired off-camera with radio triggers, fills exterior surfaces beautifully. We use 1/4 CTO (color temperature orange) gels on our strobes to match the warm interior light. A bare flash looks blue and clinical against the warm twilight palette.
For larger properties, a portable strobe with 200 to 600 watt-seconds of power gives you reach and battery life for an entire session. Continuous LED panels also work and let you see exactly how the light falls before you press the shutter. Our full breakdown of real estate photography lighting covers brands, watt-second ratings, and gel kits in detail.
Flash Popping for Exterior Balance
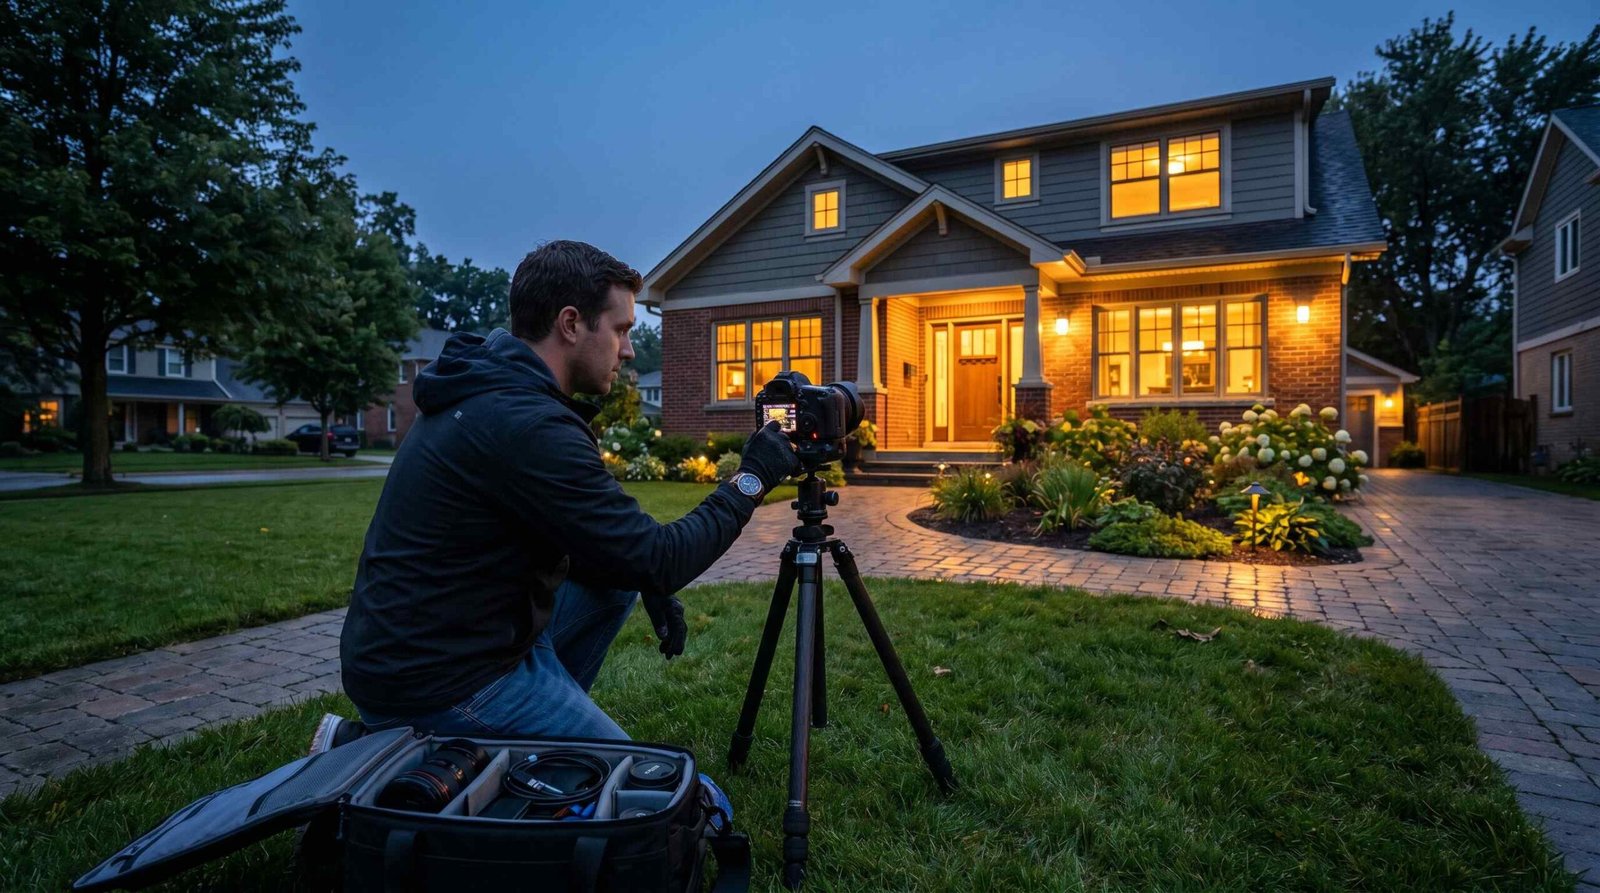
Flash popping is the advanced technique that separates a good twilight image from a great one. The problem it solves: dark foreground areas (shaded shrubs, the underside of a porch overhang, an unlit garage door) sit in deep shadow while the rest of the frame holds the balanced sky-and-window glow. A single strobe on a stand cannot reach all of those zones at once.
The technique works like this. Lock the camera on the tripod, set a long exposure (10 to 30 seconds), and open the shutter. While the shutter is open, walk the perimeter of the frame firing a handheld speedlight or battery strobe at the shadowed areas. Hit the dark shrubs once. Walk to the garage door, fire two pops at the wall, then move to the porch and fire three more aimed at the underside of the overhang. You are painting light into the frame across a single long exposure.
Typical pop counts run 5 to 20 flashes per exposure depending on how much fill you need. Aim the flash away from the camera so you do not show up in your own frame. Bounce off light walls when possible, or fire bare for harder fill. Wear dark clothing so any accidental motion blur of your body does not register.
The cleaner workflow: shoot one frame with ambient light only (no popping), then a second frame with the flash popping but identical camera settings. Blend the two in Lightroom or Photoshop, masking the flash-popped fill into just the shadow areas where you need it. This gives you control in post and avoids overcooking any single zone.
Equipment you need: a battery-powered strobe like the Godox AD200 Pro or AD300 Pro, both reliable workhorses for exterior real estate work. A wireless flash trigger to fire the strobe without cables. A handheld light stand or a small softbox for diffusion. A cable release or remote shutter keeps the camera locked while you walk the frame perimeter. Optional: a second strobe on a stationary stand for static fill on the front door area while you handle the rest.
Camera Settings for Twilight Real Estate Photography
Twilight settings are not a single recipe. They shift across the shooting window as the sky darkens. But the principles stay consistent. Here is the framework we use for every twilight session.
Aperture
Set the lens to f/8 to f/11. This range gives you maximum sharpness across the full frame and enough depth of field to keep the entire house in focus from foreground to back. Avoid going wider than f/5.6, which softens the edges and shrinks depth of field unnecessarily. Avoid going narrower than f/13, where diffraction starts robbing detail.
ISO
Start at ISO 100 and stay there as long as you can. Twilight scenes have high dynamic range, and lower ISOs preserve shadow detail when you push exposures in post. If your shutter speeds get unmanageably long (more than 30 seconds on the brighter brackets), step up to ISO 200 or 400. Modern full-frame sensors handle ISO 800 cleanly if you absolutely need it.
Shutter Speed and Exposure Bracketing
Shutter speed becomes your primary exposure variable. With aperture locked at f/8 and ISO locked at 100, you will be working with shutter speeds anywhere from 1/4 second to 30 seconds across a single bracket sequence.
Bracket aggressively. We shoot a 5 to 7 frame bracket at 1 to 2 stop intervals for every composition. The brightest frame captures shadow detail in the landscaping and dark architectural elements. The darkest frame protects window highlights and any directly visible light fixtures. The middle frames handle the sky and overall ambient.
Use your camera’s auto exposure bracketing (AEB) feature with continuous shooting and a remote trigger. The whole bracket fires in about 3 seconds, which keeps the sky color consistent across frames. For the full bracketing-to-merge workflow, our guide to HDR real estate photography walks through it step by step.
White Balance
This is where most photographers go wrong. Auto white balance is unreliable at twilight because the camera keeps re-evaluating between brackets and shifts the color cast frame to frame. That makes HDR merging messy.
Lock your white balance manually. We set Kelvin between 3800K and 4500K for a balanced twilight look. Lower (3500K to 3800K) emphasizes the blue sky and cools the overall image. Higher (4500K to 5500K) warms the scene and pushes the windows toward gold. Avoid Tungsten preset, which tints the sky an unnatural purple, and avoid Daylight preset, which makes interior lights look orange and burnt.
Shoot RAW and you can fine-tune the Kelvin temperature in post, but locking a reasonable starting point on the camera makes the bracket merge cleaner and the editing faster.
Hyperfocal Distance and Focus Technique
Stop refocusing between shots. Once the light drops below a certain threshold, autofocus starts hunting and your sharpness suffers. The fix is hyperfocal distance focusing, which keeps the entire scene acceptably sharp from a couple of meters to infinity without touching the focus ring again.
At f/8 with a 16-35mm lens on full-frame, the hyperfocal distance sits at roughly 4 meters. Focus the lens at that 4-meter mark and everything from about 2 meters to infinity stays sharp. That covers everything from the closest landscaping to the far edge of the property. No focus hunting, no missed brackets because the AF locked on a moving branch instead of the front door.
To calculate the exact hyperfocal for your specific lens, aperture, and sensor combination, use PhotoPills. The app has a hyperfocal calculator built in that gives you the precise distance to focus at, along with the near and far limits of acceptable sharpness. Set your lens to manual focus, dial in the hyperfocal distance, and tape the focus ring if you are paranoid about it shifting between shots.
One caveat. Hyperfocal sharpness is “acceptably sharp,” not pixel-perfect sharp. If your hero composition has a foreground subject within 2 meters of the lens (a fountain, a statue, a stone walkway feature) you may want to manual-focus on that specific element instead and accept some background softness. For typical front-exterior shots from across the street or driveway, hyperfocal is the faster and cleaner choice.
Star-Burst Effect on Point Lights
This is a free way to add dramatic flair to exterior twilight shots. Narrow the aperture to f/11 to f/14 and any point light source in the frame (porch lights, garage lanterns, string lights, streetlights, pool lights) creates a natural star-burst diffraction pattern. No editing, no overlay, no fake bloom. Just physics doing the work.
The number of star points depends on your aperture blade count. A diaphragm with an even number of blades produces stars with the same number of points as blades. An odd number of blades produces double the points. So an 8-blade aperture gives you 16-point stars, a 9-blade aperture gives you 18-point stars, and a 7-blade aperture gives you 14-point stars.
The trade-off is real but minor for our purposes. Diffraction at f/11 to f/14 softens the image slightly, costing maybe 5 to 10 percent of peak lens sharpness. For real estate work, the dramatic star-burst on porch lanterns and landscape lighting easily outweighs that loss. Most viewers cannot see the diffraction softness, but they immediately notice the cinematic star sparkle on every light fixture.
Practical tip: this works best on bare bulbs and lights with exposed point sources. Frosted globes, paper lanterns, and recessed cans do not star-burst. Check your scene before shooting and identify which lights will produce the effect, then adjust composition to feature them.
The Pre-Shoot Staging Checklist
The single biggest determinant of twilight image quality is what the homeowner does in the 30 minutes before you arrive. Send this checklist to your client at booking. Send it again the morning of the shoot.
- Turn on every single interior light, including closet lights, pantry lights, under-cabinet lights, and bathroom vanity lights. Even rooms not directly visible in the shot need to be lit so window reflections look consistent.
- Replace any burned-out bulbs at least 48 hours before the shoot. Mismatched bulb temperatures (some warm white, some cool white) will fight each other in the final image.
- Turn on all exterior lights: porch lights, garage coach lights, landscape path lights, deck lights, dock lights, and any architectural up-lighting.
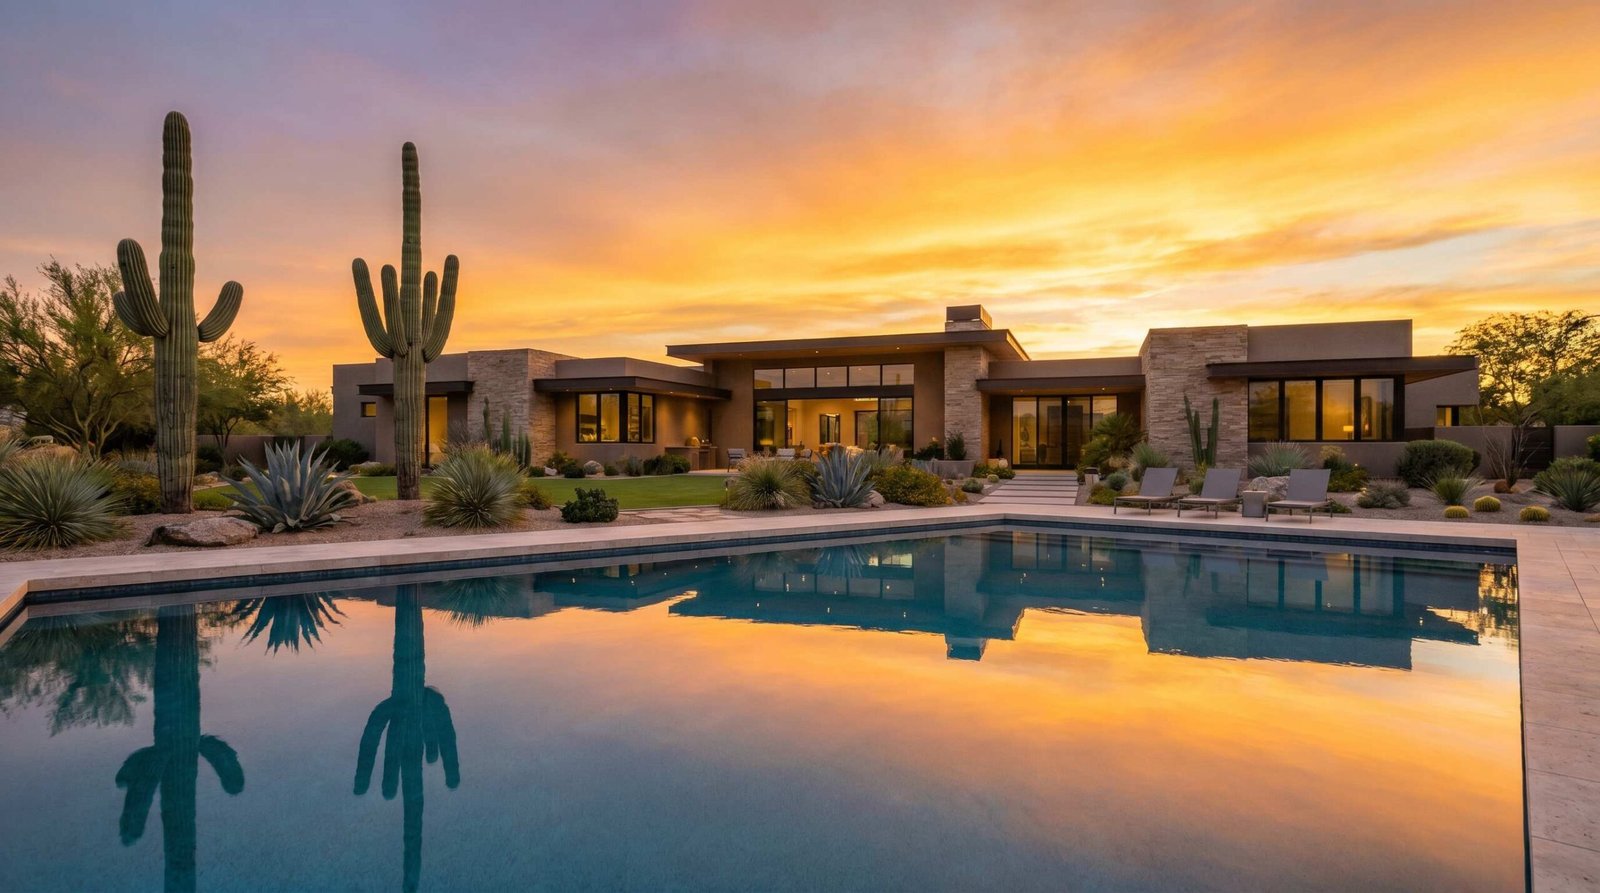
- Light the pool and any water features. If the pool has color-changing LEDs, set them to a warm white or soft amber. Avoid bright blue or green, which clashes with the twilight palette.
- Open every blind, curtain, and shutter so interior light flows out cleanly. Sheers should be tied back. Roman shades fully raised.
- Park all cars at least 200 feet down the street, including the homeowner’s vehicles and any service trucks.
- Move trash cans, recycling bins, garden hoses, kids’ toys, and pool floats out of sight.
- Remove pet food bowls and water dishes from any area visible through windows.
- Set the dining table or kitchen island with a styled vignette: a wine bottle, two glasses, fresh fruit, an open cookbook. This reads as “lived-in luxury” from outside the window.
- Run a quick vacuum over visible floors and wipe down any glass tables, especially anything visible through windows from the front exterior.
- Light a fire in the fireplace if you have one and it is safe to do so. Visible firelight through a front window adds incredible warmth.
- Brief any pets and arrange for them to be off-property or contained in a back room during the shoot.
We send this list as a PDF the day before and follow up with a text two hours before sunset. Compliance jumps when you remind people twice.
On-Location Shooting Workflow
Here is the actual sequence we run on every twilight job, from arrival to packing the gear.
Arrive 75 minutes before sunset. Walk the property with the agent or homeowner. Identify your hero angles, usually the front exterior and one or two secondary views (back of house, pool deck, driveway approach). Confirm the staging checklist is complete and fix anything that is not.
Set up the main tripod position for the hero shot 45 minutes before sunset. Lock the composition, frame the shot, and dial in your aperture, ISO, and white balance. Take a test bracket with the sun still up to confirm exposures and check for hot spots.
Position external lights 30 minutes before sunset. Place speedlights or strobes to fill the driveway, walkway, and any architectural elements that fall into shadow. Gel the strobes warm. Take test frames to balance the flash output against the (still bright) ambient.
Start shooting brackets 15 minutes after sunset. This is when the sky begins to take on color. Shoot one full bracket every 3 to 5 minutes for the next 25 to 30 minutes. The sky color will shift across the session from pale blue to deep cobalt to indigo. You want options.
Move to your secondary angle once the hero shot is captured. You typically have time for one strong secondary composition before the sky goes black. Pick the angle that shows the property’s strongest architectural feature, the pool, or the most dramatic landscape lighting.
Pack up only after the sky is fully dark. Always shoot a few extra brackets at the very end. The “late blue” frames sometimes deliver the most striking final image, and you cannot reshoot if you missed it.
Editing Twilight Real Estate Photos
Editing is half the craft. A flawless capture still needs careful post-processing to bring out the magic. Here is the workflow we use, broken into two stages.
HDR Merge and Tone Mapping
Import all bracketed frames into Lightroom or your editor of choice. Select the best bracket sequence (sky color, exposure balance, no movement in trees or flags) and merge to HDR. Adobe’s HDR guide covers how merging algorithms combine your brackets into a single 32-bit file with the full dynamic range of the scene preserved.
After the merge, work the tone curve to balance the sky against the windows. Pull highlights down to recover any blown sky areas. Lift shadows just enough to read the landscaping and architectural details, but resist the urge to flatten the contrast. Twilight images need depth. They should not look like daytime images with a blue sky.
Saturation and vibrance should be touched with restraint. Real twilight skies have natural color. Push them slightly to enhance, but stop before the image looks neon. We typically add 8 to 15 points of vibrance and 3 to 8 points of saturation in Lightroom, no more. Our breakdown of real estate photo editing software compares Lightroom, Photoshop, Aurora HDR, and Photomatix in detail.
Sky Replacement and Compositing
Sometimes the sky just does not cooperate. A flat gray ceiling of clouds, or worse, contrails slicing across the frame. Sky replacement is the rescue. Photoshop’s built-in Sky Replacement tool, or the more granular Luminar Neo sky tool, can swap in a clean twilight sky in seconds.
The trick is keeping the replacement believable. Match the sky’s color temperature to the rest of the scene. Adjust the foreground lighting to match the new sky’s color cast (a warmer sky calls for slightly warmer foreground, a cooler sky calls for cooler shadows). Pay attention to reflections in windows and pools. A new sky needs new reflections.
For interior light glow, paint a soft amber overlay on the windows using a low-opacity brush set to Screen blend mode. This enhances the warmth of the spill without making the windows look fake. Then add a subtle glow to any exterior lights (lanterns, path lights, pool lights) using a soft brush at 20 to 30 percent opacity.
Finish with a final sharpening pass, lens correction, and a gentle vignette to draw the eye toward the center of the frame.
Pricing Twilight Photography Sessions
Twilight is a premium service. Price it that way. Underpricing devalues your work and trains the market to expect twilight at daytime rates.
Here is a pricing structure we use for sessions in mid-to-major markets. Adjust for your local cost of living and competitive landscape. Markets vary widely. A Phoenix real estate photographer working the desert Southwest, for example, has a longer usable twilight season than someone working Seattle or Portland, and the desert sky tends to produce cleaner gradients with less atmospheric haze. Build that local context into your rate sheet.
| Package | What’s Included | Typical Price |
|---|---|---|
| Twilight Add-On (Same Day) | 1 hero twilight image of front exterior, captured at end of standard daytime shoot, full edit and HDR merge | $150 to $250 |
| Twilight Hero Package | 3 to 5 real twilight images (front, back, pool or feature), separate scheduled shoot, full edit suite | $350 to $600 |
| Luxury Twilight Suite | 8 to 12 twilight images including drone twilight, multi-angle ground coverage, dedicated session, premium editing with sky compositing as needed | $700 to $1,200 |
| Virtual Twilight Conversion | Daytime image converted to twilight via Photoshop editing, sky replacement, window glow, light enhancement | $30 to $75 per image |
| Twilight + Drone Combo | Ground-level twilight hero plus aerial twilight shot from drone, both fully edited | $500 to $850 |
| Failed Session Reshoot Fee | Weather-related rebook of original twilight session | $75 to $150 (or included with deposit) |
A few notes on pricing strategy. Always require a deposit for scheduled twilight sessions, since you are blocking out prime time you cannot easily resell. Build a weather reschedule policy into your contract. We waive the reshoot fee one time and charge a reduced rate for any subsequent reschedule. Offer a small discount when twilight is booked together with a full daytime shoot, since it improves close rates without significantly cutting your margins. If you are building your photography business from the ground up, our guide on how to become a real estate photographer covers licensing, gear, and landing your first clients.
Combining Twilight with Drone Photography
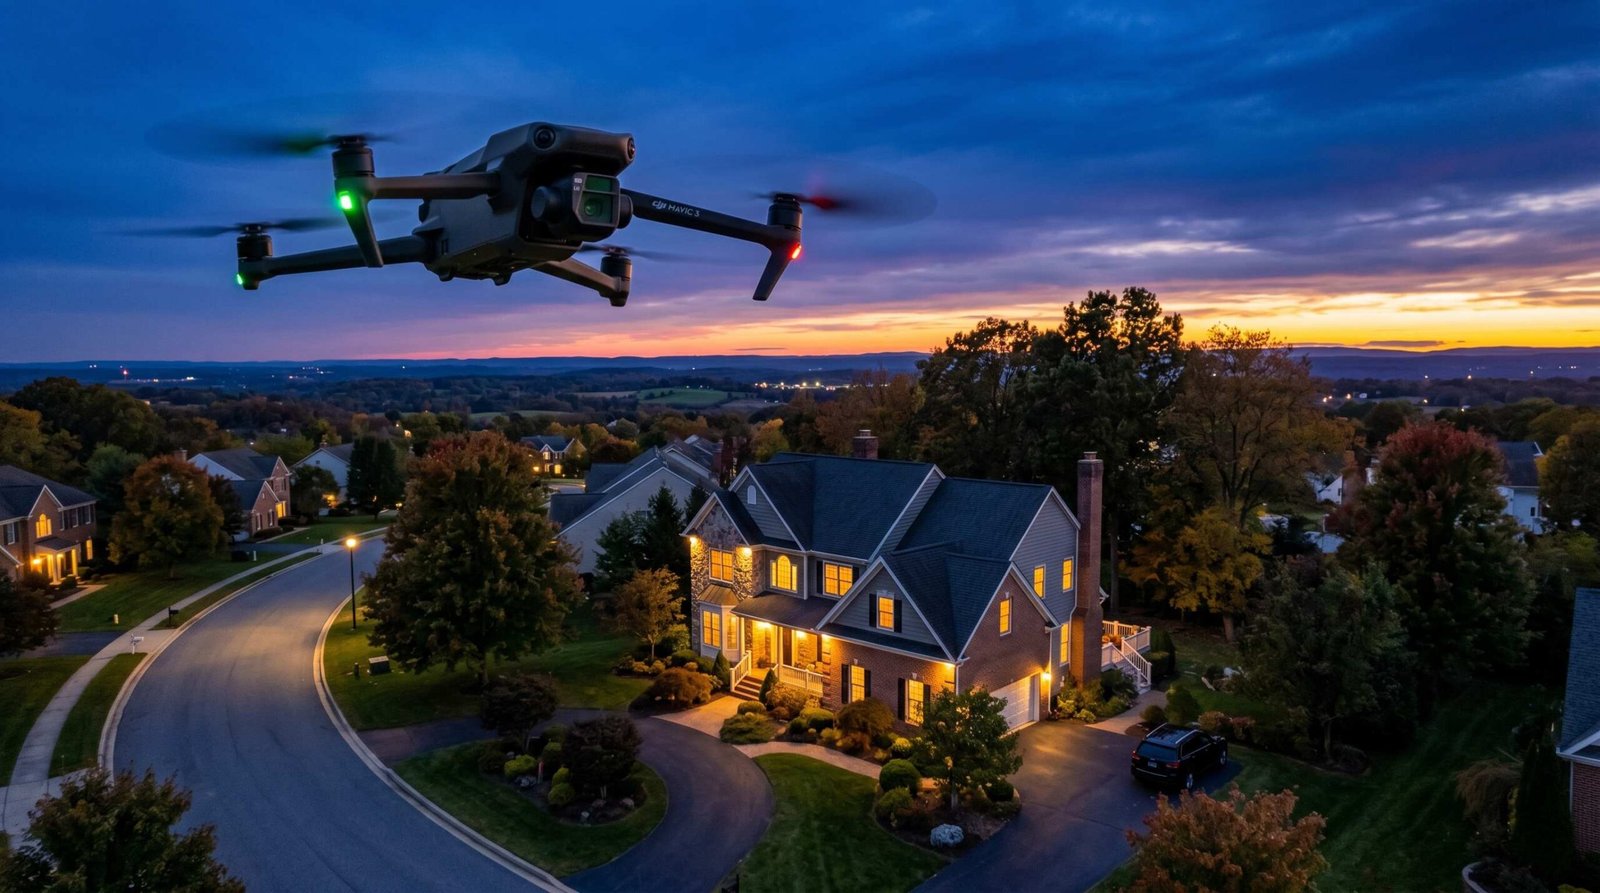
Drone twilight is the upsell that turns a good twilight package into a premium one. Aerial perspective of the property against a glowing sky shows the entire footprint: pool, landscape lighting, neighborhood context, and architectural roof lines all in a single dramatic frame. Pair that aerial with two or three ground-level twilight shots and you have a full luxury marketing kit that no daytime gallery can match.
The combination matters most for luxury real estate listings where the property has features that only read properly from above. Tennis courts, infinity pools, multi-tier landscaping, waterfront frontage, large estate lots. Buyers paying for a high-end property want to see what they are getting, and the aerial twilight shot is often the single image that closes the marketing pitch.
There is a timing challenge that catches new drone operators off guard. Ground-level blue hour and FAA daylight requirements for drones do not perfectly overlap. Under FAA 14 CFR Part 107, commercial drone operations require civil twilight conditions or anti-collision lighting after that window closes. Civil twilight extends from 30 minutes before sunrise to 30 minutes after sunset. Outside that window, you can still fly, but only with FAA-approved anti-collision lights visible from at least 3 statute miles.
The practical workflow is straightforward. Fly the aerial first, immediately after sunset while there is still enough light for safe drone operation and while you are still inside the civil twilight window. Capture your aerial brackets in the first 15 to 20 minutes after sunset. Then land the drone, swap to ground-level tripod work, and shoot the deeper blue hour from 15 to 40 minutes after sunset. You have roughly 20 to 30 minutes of overlap where both work, and the sky color actually deepens between the aerial capture and the ground-level capture, giving you two slightly different palettes for marketing variety.
Equipment add-ons for drone twilight: a compact ND filter kit lets you control exposure without cranking ISO. A polarizer cuts glare off any water features. Spare batteries, plural, since cold air shortens flight time and you do not want to lose the window swapping a single dead pack. Anti-collision lights mounted to the drone arm if you plan to fly past civil twilight.
| Package Type | Typical Price | Best Use Case | Ideal Property Types |
|---|---|---|---|
| Ground Only Twilight | $200 to $350 | Standard luxury listings, urban infill, condos with no aerial value | Townhomes, condos, smaller single-family homes |
| Aerial Only Twilight | $250 to $450 | Properties with significant exterior features visible only from above | Large lots, waterfront, golf course homes, estate properties |
| Ground + Aerial Twilight Combo | $350 to $600 | Premium marketing kit, hero MLS images, brokerage presentations | Luxury single-family, estates, resort homes, $1M+ listings |
The combo pricing has held up across markets we have tracked. Ground-only twilight typically lands in the $200 to $350 range. Adding aerial pushes the total to $350 to $600 for a complete package. The aerial upsell is one of the cleanest margin moves available to a real estate photographer who already owns a drone and a Part 107 certification.
Common Mistakes to Avoid
Even experienced photographers fall into these traps. Here are the ones that bite hardest.
Shooting too early. The most common mistake. The sky still has too much daylight, the windows look dim, and the image lacks the signature blue-and-amber contrast that defines twilight work. Wait until 10 minutes after the official sunset before you fire the first real bracket.
Letting white balance drift across brackets. Auto white balance will sabotage your merge. Lock Kelvin manually before you start the session.
Forgetting to turn on every interior light. Dark rooms behind windows look like missing teeth in the final image. The pre-shoot checklist exists for a reason.
Over-editing the sky. A purple sky that looks like a movie poster is not impressive. It is amateur. Real twilight skies are subtle. Keep them that way.
Ignoring foreground lighting. The eye reads the front of the house first. If the driveway, walkway, and front door are buried in shadow, the image fails no matter how beautiful the sky is. Bring strobes. Use them.
Skipping the test bracket. Always shoot a test sequence before the light gets critical. Confirm exposures, check for hot spots, fix flash positions. You will not have time to troubleshoot once the real shooting window opens.
Failing to communicate with the agent and homeowner. A great twilight session falls apart if cars are in the driveway, blinds are closed, or pets are running across the lawn. Set expectations early and reinforce them often.
Mistiming drone work. If you fly aerial twilight too late, you are out of the FAA civil twilight window and operating illegally without anti-collision lighting. Build a hard 30-minute-post-sunset cutoff into your drone workflow unless you have proper night-flight equipment installed.
Charging too little. Twilight delivers outsized marketing value. Price it accordingly. For more pricing and workflow guidance across the full real estate photography business, see our broader collection of real estate photography tips.
Frequently Asked Questions
What is the best time of day for twilight real estate photography?
The optimal window is 10 to 40 minutes after sunset, sometimes called the blue hour. Sky brightness balances with interior light during this period, creating the signature glowing-house look. Sunrise twilight (30 minutes before sunrise) also works and often delivers cleaner skies with less haze.
How much should I charge for twilight real estate photography?
A twilight add-on to a daytime shoot typically runs $150 to $250. A dedicated twilight session with multiple angles ranges from $350 to $600. Luxury packages including drone twilight can reach $700 to $1,200 in major markets. Virtual twilight conversions from daytime images cost $30 to $75 per image.
Is virtual twilight as good as real twilight photography?
Virtual twilight has improved dramatically and works well for budget-conscious listings or weather-spoiled sessions. Real twilight still produces superior results for luxury listings and hero marketing images because real ambient light has nuance that editing cannot fully fabricate. We suggest real twilight for properties above $750K and virtual twilight as a backup or budget option.
What camera settings should I use for twilight real estate photography?
Set aperture to f/8 to f/11, ISO to 100 (raising only if needed), and use shutter speed as your variable across a 5 to 7 frame exposure bracket. Lock white balance manually between 3800K and 4500K. Shoot RAW for maximum editing flexibility.
How long does a twilight real estate photo session take?
Plan on 90 minutes to 2 hours total on-site. You need 60 to 75 minutes of setup before sunset, then 25 to 40 minutes of actual shooting during the blue hour, plus 10 to 15 minutes to pack up after the sky goes dark.
Do I need a tripod for twilight real estate photography?
Yes, absolutely. Twilight exposures range from 1/4 second to 30 seconds, far too long for handheld shooting. A sturdy tripod also lets you bracket multiple exposures from the exact same position, which is essential for clean HDR merging in post-processing.
Can drone twilight photography be combined with ground-level twilight shots?
Yes, and it is one of the highest-value combinations you can offer. A drone twilight image taken from 80 to 150 feet above the property captures the landscape lighting, pool glow, and overall property footprint in one dramatic frame. Pair it with a ground-level hero shot for a full luxury marketing package. Time your drone work first since drone altitude makes the blue hour usable slightly longer than at ground level.
What apps do photographers use to plan twilight real estate shoots?
PhotoPills and The Photographer’s Ephemeris are the two essential planning apps. PhotoPills shows exact blue-hour start and end times by GPS location, sun and moon positions, and lets you visualize the light angle on a map before you arrive at the property. The augmented-reality view drops a virtual sun and moon path onto your phone camera feed so you can pre-visualize exactly where the light will fall on the house at any given time. The Photographer’s Ephemeris is free for web use and shows golden hour, blue hour, and civil twilight windows for any date and location. Both apps let you plan months ahead, which matters when you are booking twilight sessions for clients in advance and need to confirm sunset times before locking the calendar.
What happens if weather ruins a scheduled twilight shoot?
Build a weather cancellation clause into every twilight booking agreement. We suggest a 4-hour same-day cancellation window. If heavy overcast or rain is forecast inside that window, either party can cancel at no charge. Cloud cover is not always a dealbreaker. Thin overcast can diffuse the sky beautifully and add color and texture to the gradient. Heavy cloud blocks the blue hour window entirely and there is no way to recover the shoot. Apps like Clear Outside or Weather Underground give hourly cloud-cover forecasts specific enough to make a confident same-day call. For reschedule policy, we waive the fee for the first reschedule within 30 days and charge a small rebooking fee for any subsequent reschedule to cover setup costs and lost calendar slots.
RELATED POSTS
View all
Real Estate Photographer Phoenix: The Complete Agent’s Hiring Guide (2026)
June 2, 2026 | by Ian
Real Estate Photography Philadelphia: The Complete Agent’s Guide (2026)
June 3, 2026 | by Ian
Real Estate Photographer San Diego: The Complete Hiring Guide (2026)
June 4, 2026 | by Ian