

Real Estate Photography Equipment: The Complete Gear Guide
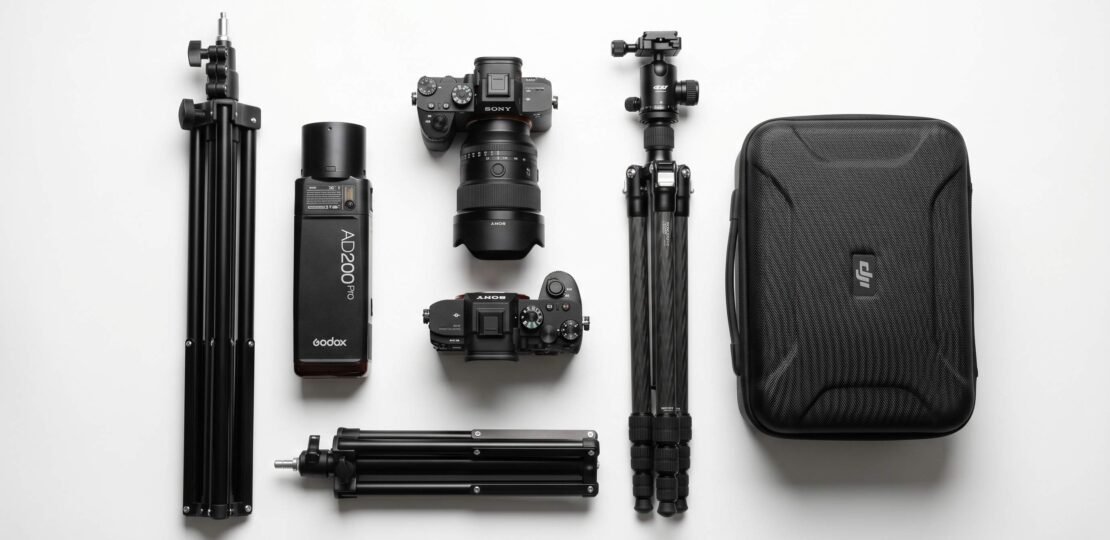
Walk out to any working real estate photographer’s car and pop the trunk. You’ll find a kit that looks remarkably similar across the country: a full-frame mirrorless body, one wide-angle zoom, two or three speedlights with stands, a sturdy tripod, a folding cart for hauling everything inside, and a drone case tucked in the corner. That’s it. The gear that drives a profitable real estate photography business isn’t exotic. It’s a small set of well-chosen tools used repeatedly, often two to four times a day, every weekday. This guide breaks down exactly what to buy, in what order, and at what price point, based on what working photographers actually use to shoot 40 to 80 listings a month.
What equipment do you need for real estate photography? You need a full-frame mirrorless camera (Sony A7 IV or Canon R6 Mark II), a wide-angle zoom lens (16-35mm range), a sturdy tripod with a leveling head, two to three speedlights with stands for flash bracketing, a circular polarizer, plenty of memory cards and batteries, and editing software (Lightroom plus Photoshop). Add a drone like the DJI Mavic 4 Pro or DJI Mini 4 Pro once jobs cover the cost.
What to Buy First: Priority Order for New Photographers
If you’re starting a real estate photography business from scratch, the temptation is to buy everything at once. Don’t. Real estate photography is a craft where one camera and one good lens get you 80 percent of the way to a professional result. The remaining 20 percent comes from discipline, practice, and a tight editing workflow, not from a more expensive body. Add gear in this order, paying off each piece with paid shoots before moving to the next.
Treat your kit as a business expense, not a hobby purchase. Every piece of gear should earn its cost back within 60 to 90 days of acquiring it. If a piece of equipment isn’t generating revenue at that pace, it’s a sign you bought it too early. We’ve seen too many beginners start with $8,000 of gear, struggle to book five jobs, and end up selling everything at a 30 percent loss six months later. The slower path through the priority list below builds both your gear and your client base together.
- Camera body and one wide-angle zoom lens. This is your foundation. Without a competent camera and a lens that captures interiors at 16mm to 24mm on full-frame, you cannot deliver listing photos.
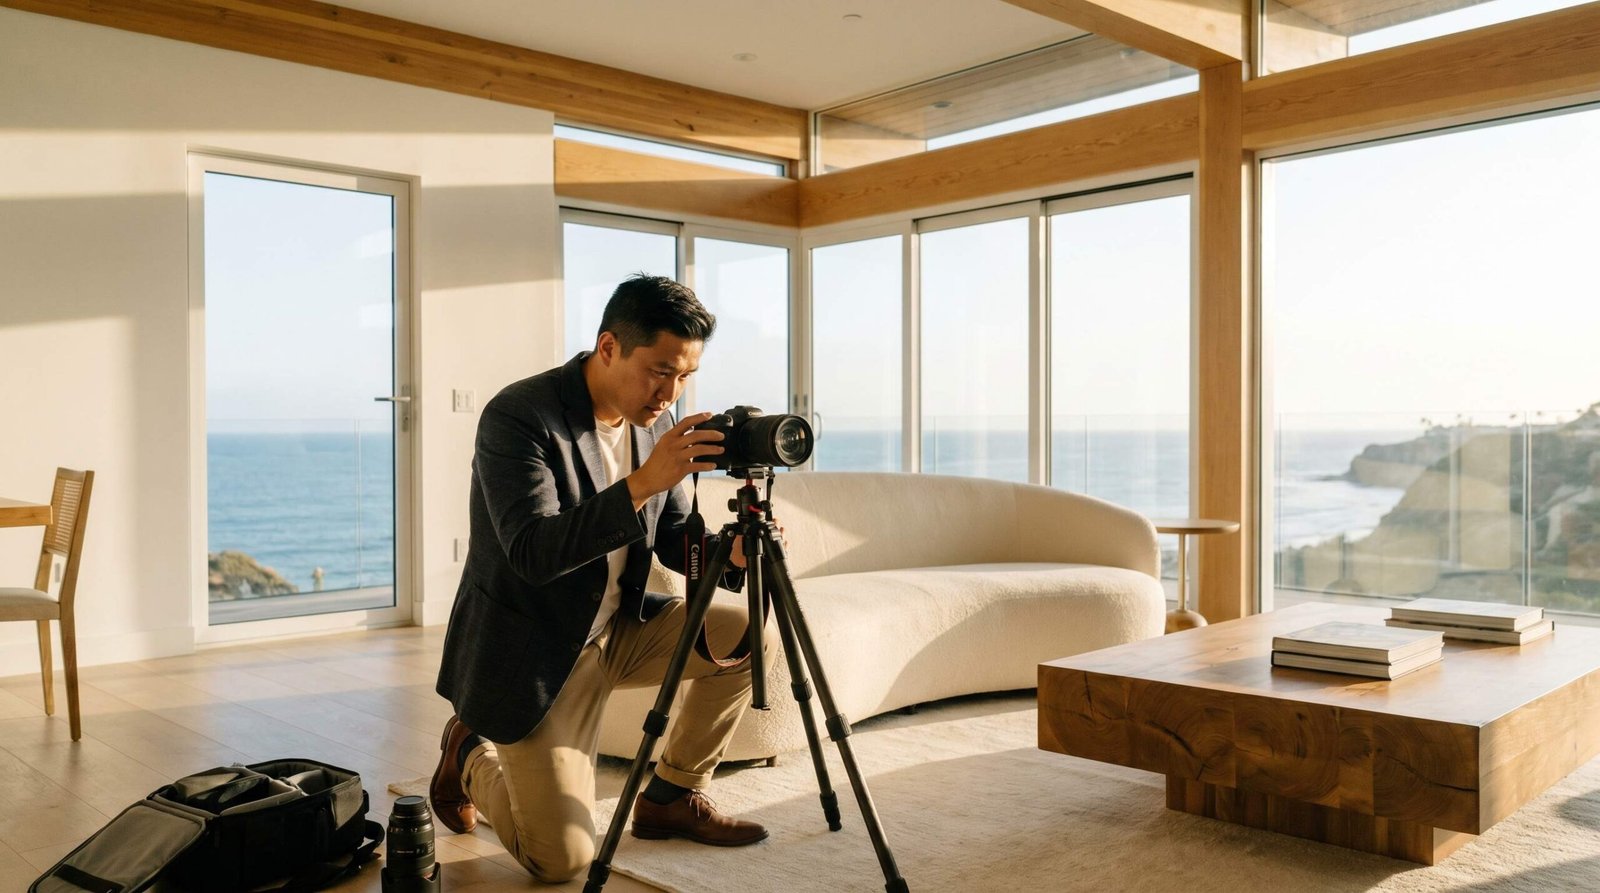
- A sturdy tripod with a leveling base or geared head. Real estate photography is tripod work. Handheld shots produce skewed verticals and inconsistent exposures across a set.
- One off-camera flash (a Godox AD200 Pro is the standard) plus a wireless trigger. Flash transforms shadowy interiors and lets you balance window light against the room.
- Memory cards, spare batteries, and a circular polarizer. Small accessories that punch above their cost.
- A second and third flash for multi-flash bracketing. Once you’re booking three or more shoots a week, multi-flash workflows pay for themselves quickly.
- A drone. Add this last. Drones are great upsells, but you should be profitable on the ground first.
Resist the urge to chase the latest gear. A photographer with a five-year-old Sony A7 III, a 16-35mm f/4, and three speedlights will out-deliver a beginner with a Sony A7R V and no flash workflow. The discipline of the shoot matters more than the badge on the camera.
Cameras for Real Estate Photography
The best camera for real estate photography is one with full-frame sensor coverage at wide focal lengths, reliable color science, in-body image stabilization, and dual card slots for redundancy. Pixel count past 24 megapixels is nice to have, not essential. What you absolutely need is clean shadow recovery (because you’ll lift shadows on virtually every interior shot) and consistent white balance from frame to frame.
Reliability matters more than spec-sheet bragging rights. A real estate body works hard: it gets set up and torn down 30 to 50 times a day, ferried between hot cars and cold air-conditioned interiors, and asked to shoot exposure brackets in difficult mixed lighting on every assignment. The camera you pick should feel solid in the hand, have a deep buffer for bracketed sequences, and run quietly enough that you can shoot in occupied homes without disturbing the residents. Body weight matters too. After a 10-hour day shooting four listings, a camera-plus-lens combo that’s even 200 grams lighter saves your shoulders.
Full-Frame vs Crop Sensor
Full-frame sensors win for real estate work for two reasons. First, the wider field of view at a given focal length: a 16mm lens on full-frame gives you genuinely wide coverage, while the same lens on APS-C is closer to 24mm equivalent, which is too tight for many bathrooms and small bedrooms. Second, full-frame handles dynamic range better, which matters when you’re balancing a bright window against a dark interior corner.
That said, crop sensor bodies have a real place in this work. The Sony a6700 paired with the Sigma 10-18mm f/2.8 DC DN is one of the best lightweight real estate kits on the market, and the body itself has excellent autofocus and 4K video. For photographers shooting smaller homes or working primarily as a second-camera operator, APS-C remains a smart, lighter, less-expensive route.
Top Camera Picks by Budget
Starter tier (under $2,000 body): The Sony a6700 is the obvious pick. It pairs a 26-megapixel APS-C sensor with the same autofocus tech found in higher-end Sony bodies, plus 5-axis IBIS and 4K 120fps video. With the Sigma 10-18mm f/2.8 lens (covered in the lens section), the total kit comes in well under $2,500.
Mid tier ($2,000 to $3,500 body): The Sony A7 IV remains the workhorse of the industry. 33-megapixel full-frame sensor, dual card slots, excellent autofocus, 4K 60fps video, and IBIS. It is the camera most working real estate photographers reach for first when replacing an older body. Canon shooters get the same value from the Canon EOS R6 Mark II, which has slightly better video features and excellent dual-pixel autofocus. Nikon shooters get the Nikon Z6 III, which has expedition-grade weather sealing and class-leading 6K RAW video for hybrid stills/video photographers.
Pro tier ($3,500+ body): The Sony A7R V is the no-compromise pick. 61 megapixels gives you headroom to crop without losing detail, 8-stop IBIS makes handheld brackets viable, and the AI-driven autofocus is genuinely best-in-class. If you shoot luxury real estate photography and your clients zoom into details, the A7R V’s resolution earns its premium.
Lenses for Real Estate Photography
Lens choice matters more than camera choice in this work. A great lens on a mid-tier body delivers better files than a mediocre lens on a flagship body. Real estate photography lenses come in two main flavors: wide-angle zooms that handle 90 percent of shots, and specialty lenses (tilt-shift, ultra-wide primes) for specific scenarios.
Wide-Angle Zooms (Full-Frame)
The classic real estate focal range on full-frame is 16-35mm. This gives you 16mm to 20mm for tight interiors, 24mm to 28mm for living rooms and kitchens, and 35mm for detail shots and vignettes that look more natural than ultra-wide framing. We suggest never shooting below 16mm on full-frame for primary interior shots; wider than that introduces severe distortion at the edges that no software can fully correct.
Top picks: Sony FE 16-35mm f/2.8 GM II (the gold standard, fast aperture for low-light interiors, $2,300), Sony FE 16-35mm f/4 PZ G (much smaller and lighter, sharper than the original f/4 version, $1,200), Canon RF 14-35mm f/4L IS USM (the 14mm wide end gives a genuine edge in tight rooms, $1,700), and Tamron 17-28mm f/2.8 (the value pick for Sony shooters, $900, surprisingly sharp).
Wide-Angle for Crop Sensor Bodies
The Sigma 10-18mm f/2.8 DC DN Contemporary is the standout APS-C wide-angle for real estate work. On a Sony a6700, it covers a 15-27mm full-frame equivalent range, hitting the sweet spot for interiors. The lens is featherweight at under 270 grams, sharp corner-to-corner from f/4 onward, and costs roughly $660. Paired with the a6700 it’s a complete, professional kit at a fraction of full-frame pricing. For photographers who want a lighter walking kit or a backup body, this combination is hard to beat.
Tilt-Shift Lenses
A tilt-shift lens, like the Canon TS-E 17mm f/4L or the Nikon PC 19mm f/4E, lets you keep vertical lines perfectly parallel by shifting the lens rather than tilting the camera. The result is interior shots with no perspective distortion that needs correcting in post. The cost is steep (both lenses run north of $3,500) and the use case is narrow: most working photographers correct vertical lines in Lightroom and don’t miss tilt-shift gear. We suggest skipping this category unless you’re shooting high-end architecture or commercial work where exacting verticals are a deliverable.
Lens Picks by Budget
- Starter: Sigma 10-18mm f/2.8 DC DN (for Sony a6700 or other APS-C body) – $660
- Mid: Sony FE 16-35mm f/4 PZ G or Tamron 17-28mm f/2.8 – $900 to $1,200
- Pro: Sony FE 16-35mm f/2.8 GM II or Canon RF 14-35mm f/4L – $1,700 to $2,300
Lighting Equipment
Light is the difference between a real estate photo and a real estate photograph. Natural light alone produces flat, overexposed windows and dim interior corners. Flash, used thoughtfully, lets you keep window detail while opening up the room. Real estate photographers fall into one of two lighting camps: single-flash workflows (one strobe, multiple exposures composited in post) and multi-flash workflows (three or more strobes firing simultaneously). Both produce excellent results when executed well.
On-Camera Speedlights
On-camera flash is for emergencies and quick documentation, not for finished real estate photography. Direct on-camera flash creates harsh shadows behind furniture and ugly reflections in windows. The only on-camera scenario worth flash is when bouncing off a white ceiling to lift dim corners, and even then most photographers prefer off-camera setups. Where the small speedlights earn their keep is as fill flashes in larger multi-flash rigs, tucked into hallways or back rooms to extend even coverage through a large home. A pair of Godox TT685 speedlights running on the same trigger system as your AD200s gives you four points of light for under the cost of two more AD200s.
Off-Camera Strobes
The Godox AD200 Pro is the unofficial standard for real estate work. 200 watt-seconds of power (plenty for bouncing off ceilings in large rooms), bare-bulb head option for soft fall-off, fast recycle times, and a battery that lasts 500-plus full-power flashes. It pairs with the Godox X-Pro trigger that fires all of your strobes in sync. Expect to spend roughly $350 per AD200 Pro plus $70 for the trigger. Most working photographers run two to four AD200s plus several smaller TT685 speedlights for fill positions.
For multi-flash workflows, the typical setup is: main flash bouncing off the ceiling near the camera, a second flash bouncing into the back of the room, and a third flash positioned to light a specific dim area (a hallway, a dark corner, the area under a peninsula in a kitchen). When all three fire simultaneously, the room reads evenly lit in a single frame, eliminating most of the bracket-and-blend work in post.
Continuous Lighting
Continuous LED panels (like the Aputure Amaran 200x S) have a niche role for real estate video and the rare interior scenario where flash isn’t workable. For stills, continuous lighting is a slower workflow with lower power output. Most real estate photographers don’t carry continuous lights, but if you offer video walkthroughs, one or two LED panels are worth packing.
Tripods and Camera Support
A real estate tripod needs three qualities: stability under a real-world camera-and-lens combo (typically 3 to 5 pounds of gear), a smooth way to level the camera, and quick deployment. You’ll set the tripod up 25 to 40 times per shoot, so anything fiddly will slow you down considerably. Time spent fighting your tripod is time not spent shooting, and on a busy day where you might cover three or four listings before lunch, those small frictions add up to hours per week.
Tripod height matters more than most beginners realize. Real estate photography is usually shot at chest height (roughly 50 to 56 inches) for typical living spaces, and slightly lower for kitchens to better show countertop surfaces. Pick a tripod whose maximum height comfortably exceeds your typical working height; you don’t want to extend a center column to its limit on every shot because that’s where flex and instability set in.
The Manfrotto 055XPro3 is the most common real estate tripod. Aluminum, sturdy, with a center column that flips horizontal for low overhead shots. For lighter kits and travel, the Peak Design Travel Tripod (carbon fiber, ~$640) folds compactly and sets up fast. Pair either with a Manfrotto 410 Junior Geared Head for precise leveling. Geared heads are slower than ball heads at first, but the precision (you turn knobs to dial in level rather than wrestling with a single ball lock) is genuinely faster once you build the habit.
For overhead shots and creative angles, a monopod or a horizontal arm extension on your tripod gives you flexibility without buying additional gear. We suggest avoiding the cheapest tripod tier; flex in the legs causes micro-vibrations that show up at slow shutter speeds and ruin otherwise clean files.
Drones for Aerial Real Estate Photography
Drone shots are the single most effective upsell in real estate photography. Aerial exteriors, lot context, and twilight shots add genuine value to a listing and command premium pricing. Most photographers charge between $150 and $400 extra for a drone package on top of the base photo shoot, which means the drone itself often pays for itself within 10 to 15 jobs. Before buying any drone, confirm you have an FAA Part 107 Remote Pilot Certificate. Commercial drone work in the United States requires it; flying without certification puts your business at legal and insurance risk.
Aerial work also opens the door to higher-margin services like construction progress documentation, hotel and commercial property exteriors, and large-acreage rural listings that need context shots to make sense to buyers. Once you’re comfortable with the basics of flight, those adjacent markets are an easy expansion off your existing real estate client base.
Top Drone Picks by Budget
Starter tier: The DJI Mini 4 Pro is the obvious entry point. At under 250 grams it slips below the FAA’s registration weight threshold (though you still need Part 107 for commercial use), packs a 1/1.3-inch sensor that shoots clean 4K HDR video, and folds down to fit in any camera bag. Roughly $1,000 with the Fly More combo. For most starter aerial work on residential listings, the Mini 4 Pro is genuinely enough.
Mid tier: The DJI Air 3S brings a 1-inch primary sensor and a second medium-tele camera, ND filters included in the Fly More combo, and stronger wind resistance than the Mini. At roughly $1,400 with accessories, it’s the sweet-spot drone for photographers who want noticeably better image quality without jumping to a pro-tier price.
Pro tier: The DJI Mavic 4 Pro took over the top spot in early 2026. It carries three cameras (24mm, 70mm equivalent, and 168mm equivalent), all of which shoot D-Log color for matched grading across focal lengths. The primary 4/3 Hasselblad sensor produces excellent dynamic range, 5.1K video runs at 60fps, and battery life is meaningfully longer than the Mavic 3 Pro it replaces. Expect roughly $2,799 for the Fly More Combo. This is the drone if you shoot luxury listings, large estates, or marketing video that calls for matched B-roll across multiple focal lengths.
The DJI Mavic 3 Pro remains an excellent value alternative at roughly $2,199 if you can find new stock. Same three-camera concept, just with shorter battery life and the older D-Log limited to the primary camera.
ND Filters for Drone Video
If you’re shooting any drone video, ND filters are non-negotiable, not optional. Cinematic motion blur requires a shutter speed close to twice your frame rate (1/60s for 30fps video, 1/100s for 60fps video). In daylight, those shutter speeds at the drone’s fixed aperture will blow out highlights without ND glass to cut the light. The DJI-branded ND filter sets (ND16, ND32, ND64, ND128 for the Mavic 4 Pro and Mavic 3 Pro) are precisely tuned for the lens and cost roughly $130 to $160. Third-party sets exist but the DJI sets are color-neutral and don’t introduce vignetting. For stills-only drone work, ND filters aren’t necessary; the drone’s auto exposure handles photo work cleanly.
3D and Virtual Tour Equipment
Virtual tours are now a standard add-on, particularly for listings above the local median price point. There are two main routes: dedicated 3D capture systems and 360-degree cameras that produce panoramic tours. Picking between them depends on your local market, your typical listing size, and how aggressively your competitors are already offering tours. If you’re the only photographer in your market offering Matterport-quality tours, you can charge a premium. If three other photographers already offer them, expect to compete on price.
Matterport Pro3: The gold standard for true 3D virtual tours. Uses LiDAR to build accurate floor plans and interactive walkthroughs. The camera runs roughly $5,500 plus a monthly Matterport subscription. ROI is strong if you can charge clients $300 to $500 per tour and book consistently.
Ricoh Theta Z1: A 360-degree camera that captures HDR spherical panoramas. Pair with tour-hosting platforms like CloudPano or Zillow 3D Home. Roughly $1,000 plus subscription. Lower image quality than Matterport, but a much faster shoot workflow: you can capture an entire mid-sized home in 20 minutes.
Many photographers start with the Ricoh Theta Z1 to test the market in their area before investing in Matterport. If 3D tours are a small percentage of your bookings, the Theta route is the smart way in.
Editing Software
Editing is half the job. The shot you capture in-camera is the raw material; the finished real estate photo is built in Lightroom and Photoshop. Most working photographers spend roughly equal time behind the camera and at the desk, and the photographers who scale to six-figure businesses are usually the ones who solve their editing workflow first. Most working photographers use a two-tool workflow: Adobe Lightroom Classic for ingestion, batch processing, color, and basic exposure work; Photoshop for compositing flash exposures, window pulls, and detail cleanup (removing power cords, fixing trash bin reflections, masking out empty light fixtures).
The Adobe Photography Plan at roughly $12 per month gets you both. Additional tools to consider: LR/Enfuse for batch HDR blending; Topaz Photo AI for noise reduction on darker shots; Luminar Neo for sky replacements on cloudy exterior days. Most photographers don’t need every plugin; Lightroom plus Photoshop covers 90 percent of the work.
For workflow management, build a Lightroom preset library tuned to your camera and lighting style. The first 20 to 30 listings you shoot will calibrate your presets; after that, your edit time per house should drop from several hours to under 90 minutes. The other half of the editing equation is hardware. A real estate photographer benefits enormously from a calibrated monitor (the BenQ SW271C or a similar 27-inch IPS panel runs around $1,000 and pays for itself in fewer client reshoots from color mismatches), a fast SSD for active project storage, and a NAS or external drive setup for archives. Storage costs are real: 60 listings per month at 3 to 6GB of RAW per shoot adds up to roughly 3TB of new data per year before any editing files. Plan for redundant backups from day one.
Outsourced editing is the lever that frees up working photographers to shoot more. Services like Phixer, BoxBrownie, and Spotless Agency edit professionally-shot real estate brackets at a per-photo or per-listing rate. Most charge between $1 and $3 per finished image, with same-day or next-day turnaround. Sending the editing out lets you take on more shoots, raise your day rate, and still come out ahead on margin. Most photographers running 40-plus listings a month use a hybrid approach: shoot everything, then outsource the routine edits while keeping luxury and detail-heavy shoots in-house.
Filters and Accessories
The small stuff matters. Filters, memory cards, and battery strategy are the parts of a kit that working photographers obsess over once they’ve nailed down camera and lens choice. These accessories rarely get YouTube reviews, but they make or break a busy shoot day.
Circular Polarizers (CPL Filters)
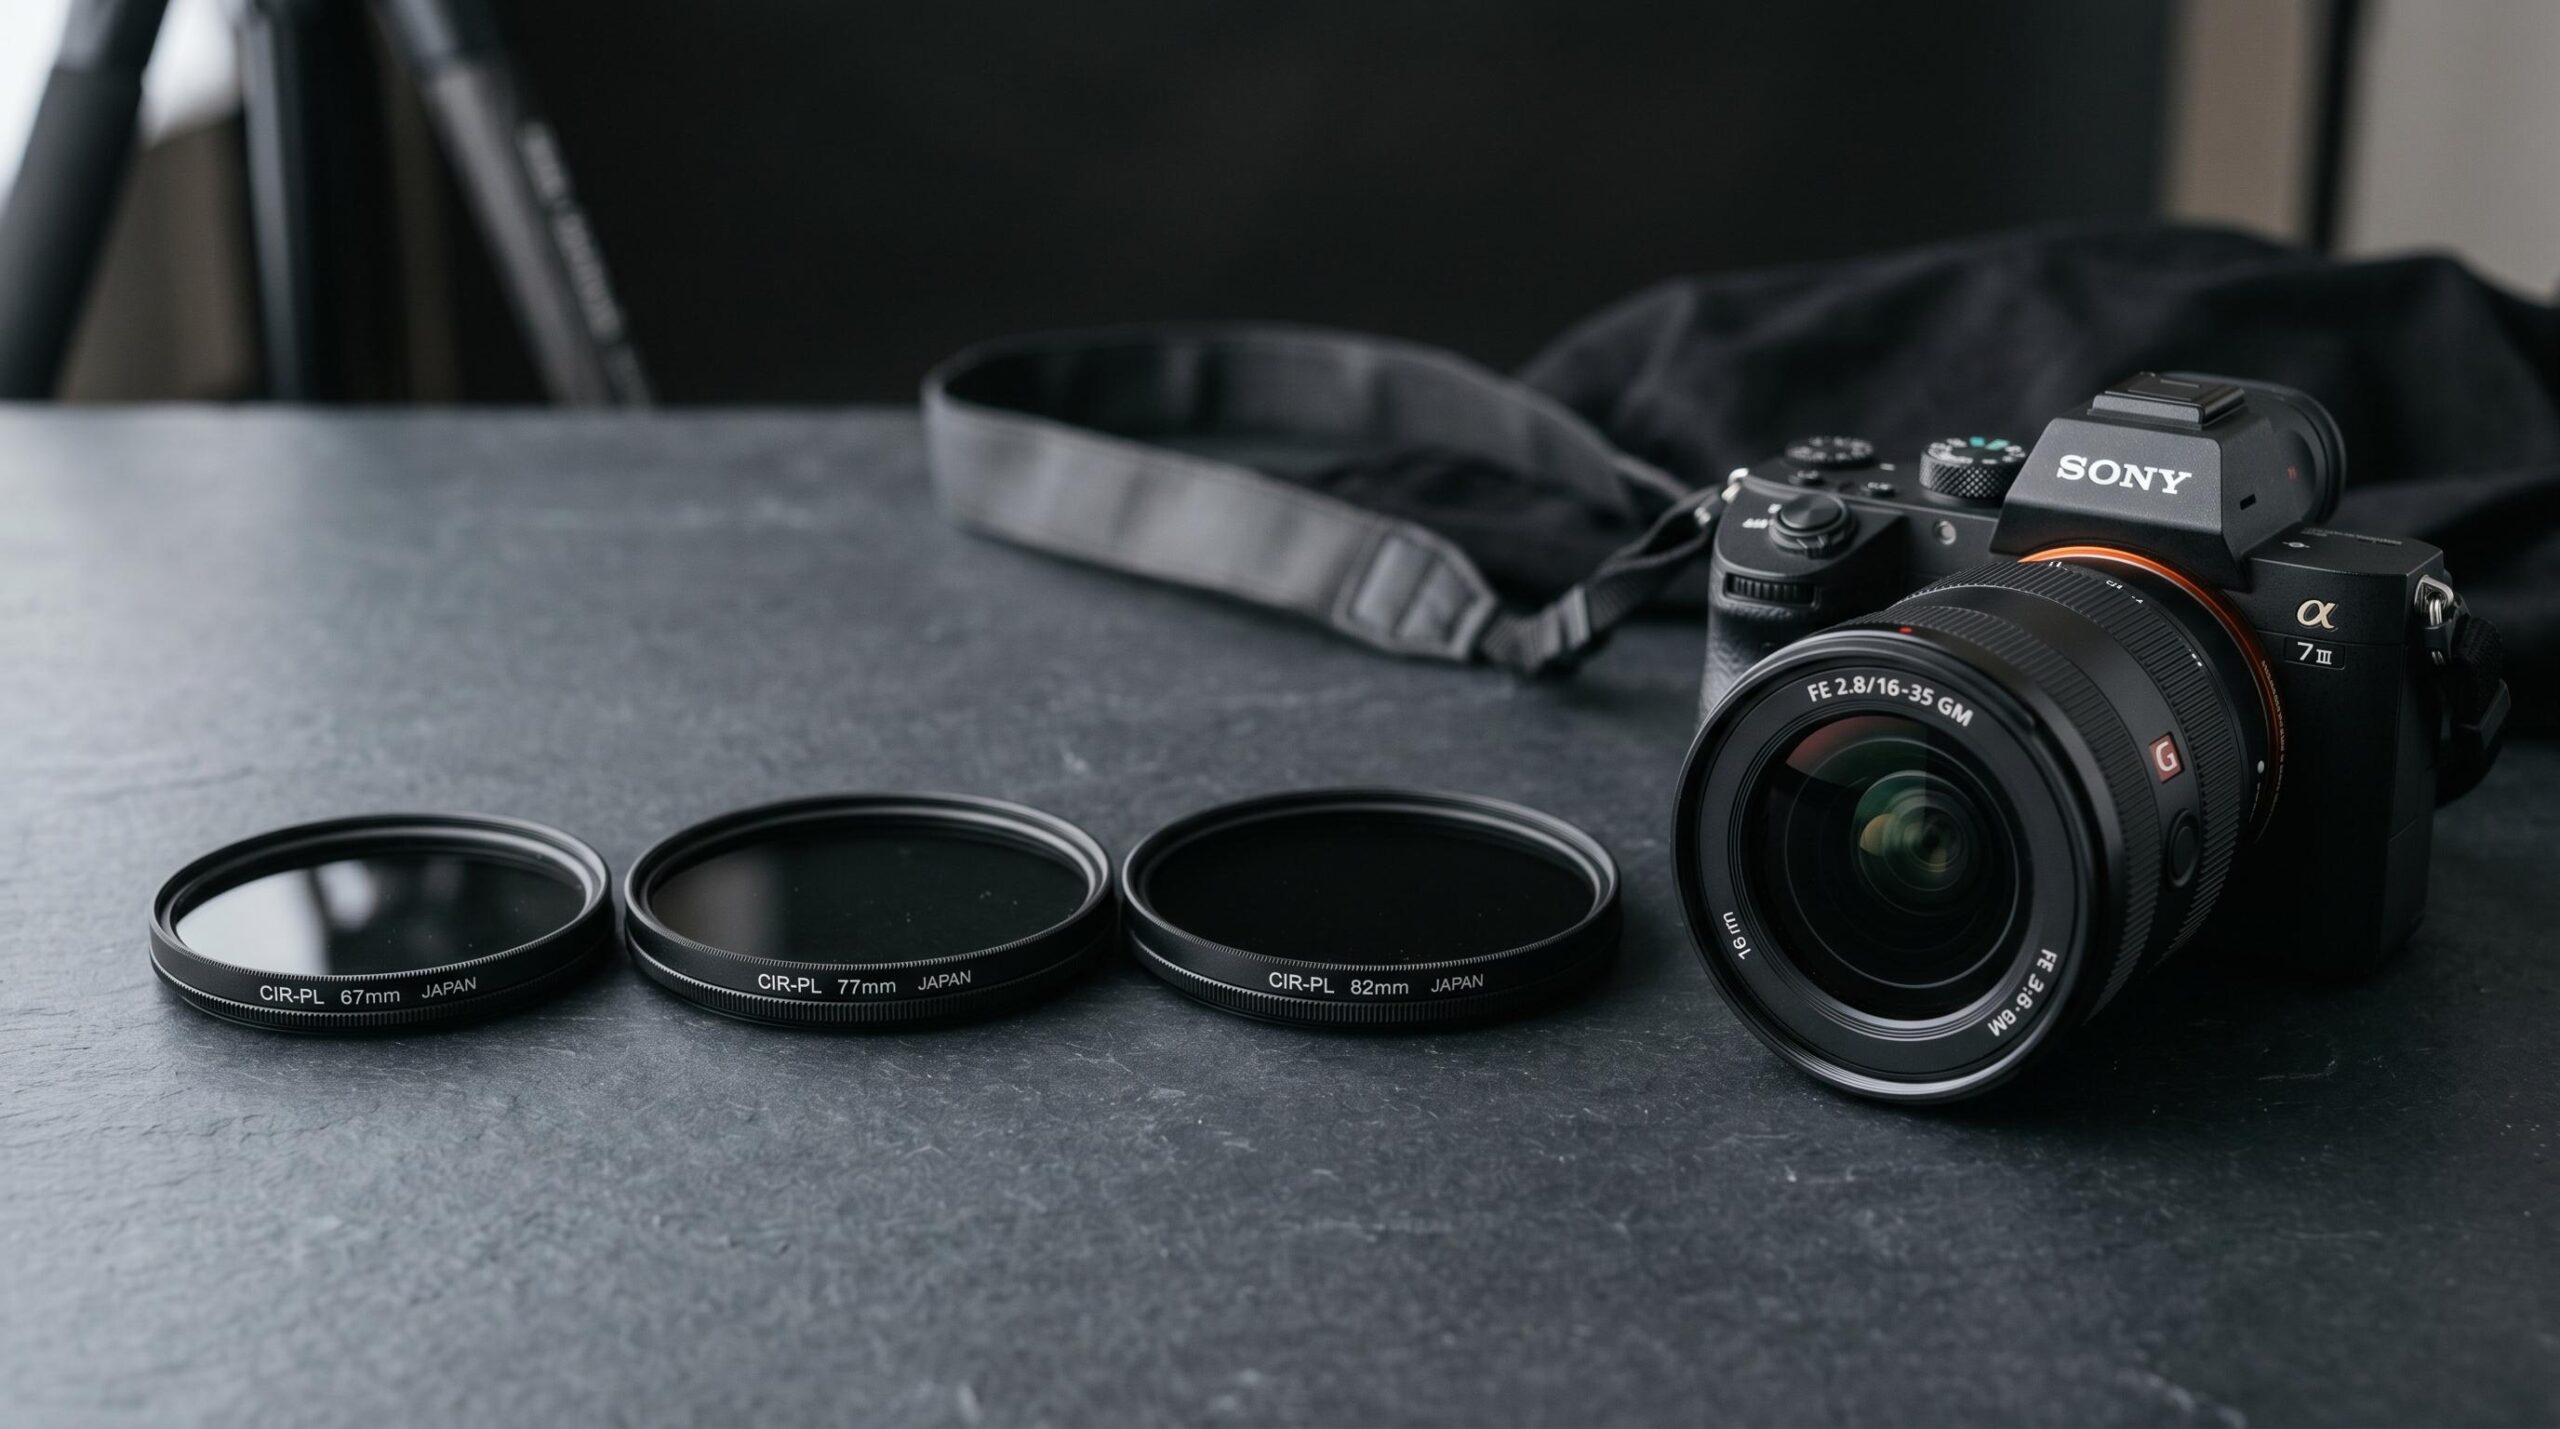
The circular polarizer is the most underrated accessory in real estate photography. Indoors, a CPL cuts glare on hardwood floors and tile, especially in rooms where direct window light hits a polished surface. The hardwood goes from a blown-out reflection to showing actual grain and color. Outdoors, a CPL deepens sky contrast, kills the glare on window panes (you see through them instead of around them), reduces reflections on car hoods in driveway shots, and saturates lush landscaping. It’s the single accessory that improves photos in a way clients notice immediately, even if they can’t articulate why.
Filter size depends on your lens. The Sony 16-35mm f/2.8 GM uses a 82mm thread; the Sony 16-35mm f/4 PZ G uses 72mm; the Sony 16-35mm f/4 (older) uses 72mm; the Canon RF 14-35mm f/4L uses 77mm; the Sigma 10-18mm f/2.8 for APS-C uses 67mm. Get a CPL that matches your most-used lens, then add step-up rings if needed for backup lenses.
One trade-off: a CPL costs roughly 2 stops of light, so use it in bright conditions or compensate with flash. Budget pick: K&F Concept Nano-X CPL (solid optical quality, minimal color cast, $25 to $40). Mid-range: B+W XS-Pro or Hoya HD ($60 to $90). Pro pick: Breakthrough Photography X4 CPL (the cleanest color performance on the market, $90 to $110, worth every dollar for working photographers).
Other Lens Filters
UV and protective filters are optional. They’re mainly useful when you’re shooting exterior in dusty, coastal, or rainy conditions where the front element is exposed to abrasive particles. Variable ND filters have an occasional use for interior video walkthroughs (smoothing exposure in mixed-light rooms), but for drone work, fixed ND filters in calibrated steps (ND16, ND32, ND64) are far better because you can dial in a precise shutter for cinematic motion blur.
Memory Cards
For dual-slot bodies like the Sony A7 IV and Canon R6 Mark II, run UHS-II SD cards. We suggest 64 to 128GB V60-rated cards from Lexar Gold or ProGrade Gold ($60 to $100 each). For UHS-I starter bodies like the Sony a6700, a 128GB V30 card is adequate. Buy two cards per body and shoot redundantly to both slots. Memory card failure is rare but catastrophic when it happens; redundant capture eliminates the risk.
CF Express Type B cards are faster but mostly relevant if you’re shooting high-frame-rate video or long RAW bursts. For real estate stills, the speed advantage doesn’t translate to a meaningful workflow difference.
Battery Strategy
Real estate photography is battery-intensive. A photographer shooting 40 to 80 locations per month burns through 6 to 10 batteries during a multi-location day. The Sony NP-FZ100 (the standard battery for the A7 IV, A7R V, A7V, and a6700) lasts roughly 600 shots per charge in real-world conditions with the screen on. Plan for at least 3 charged batteries per half-day shoot, more if you’re using IBIS heavily or shooting brackets.
Third-party batteries from Wasabi and Patona Platinum are viable and cost roughly 40 percent less than genuine Sony. The trade-off is shorter per-charge lifespan (closer to 450 shots) and somewhat shorter overall battery life across years. Most working photographers run a mix: two genuine Sonys for primary work and three or four third-party batteries as backup. Invest in a dual-bay charger (the Sony BC-QZ1 or a compatible third-party unit) so you can keep two batteries topping up between shoots.
Shooting for Photo and Video
A growing share of real estate photographers now offer walkthrough video as a paid add-on, particularly for listings above the local median price point. If video is part of your service menu, camera choice matters beyond stills quality. Some bodies that excel at photos struggle with the demands of sustained video work.
The Sony A7 IV shoots competent 4K/30p video but has two limitations for serious video work: it gets warm on long takes and can shut down on hot shoots, and 4K above 30fps crops the sensor. For 90-second listing videos, this is fine. For longer cinematic walkthroughs, you’ll want something else. The Sony A7 III, while excellent for stills, is no longer a strong choice for video; its 4K is oversampled from a Super35 crop, and HEVC handling falls behind modern bodies.
The best dual-purpose picks today: the Sony A7V (4K 60fps uncropped, excellent dynamic range, no thermal issues on typical real estate run times), the Sony a6700 (4K 120fps in 10-bit on a crop sensor, genuinely exceptional video quality for the price), and the Canon EOS R6 Mark II (excellent 4K with dual-pixel autofocus that nails focus pulls during walkthroughs).
If you’re moving into hybrid work, IBIS plus in-lens optical stabilization makes a real difference for handheld walking shots. Get a wired Rode VideoMicro or Rode VideoMic Pro+ for clean audio, learn to monitor shutter speed (twice your frame rate for natural motion), and pack ND filters for outdoor segments. Most real estate listing video doesn’t need cinema-level specs. Smooth pans, consistent exposure across rooms, and clean audio matter far more than 10-bit color grading or RAW video. Master the basics on whichever body you own before chasing higher-end video specs.
Equipment Comparison: Kit Tiers
The table below shows three complete kits at three budget tiers. These are full kits ready to shoot a paying job on day one, not piecemeal lists.
| Category | Starter Kit | Mid Kit | Pro Kit |
|---|---|---|---|
| Camera Body | Sony a6700 ($1,400) | Sony A7 IV ($2,500) | Sony A7R V ($3,900) |
| Wide-Angle Lens | Sigma 10-18mm f/2.8 ($660) | Sony 16-35mm f/4 PZ G ($1,200) | Sony 16-35mm f/2.8 GM II ($2,300) |
| Tripod | Manfrotto 190X ($200) | Manfrotto 055XPro3 + 410 head ($550) | Peak Design Travel Tripod + 410 head ($900) |
| Flash | 2x Godox TT685 + trigger ($300) | 2x Godox AD200 Pro + trigger ($770) | 3x Godox AD200 Pro + trigger ($1,120) |
| Drone | DJI Mini 4 Pro Fly More ($1,000) | DJI Air 3S Fly More ($1,400) | DJI Mavic 4 Pro Fly More ($2,799) |
| CPL Filter | K&F Concept ($35) | Hoya HD ($75) | Breakthrough X4 ($100) |
| Memory Cards | 2x 128GB V30 ($80) | 2x 128GB V60 ($200) | 2x 128GB V60 ($200) |
| Editing | Adobe Photography Plan ($144/yr) | Adobe Photography Plan ($144/yr) | Adobe Photography Plan + Topaz ($300/yr) |
| Approx Total | $3,820 | $6,840 | $11,620 |
The starter kit produces fully professional results. We’ve shot multi-million-dollar listings on starter-tier gear and delivered files clients praised. The jump from starter to mid is about reliability and resolution headroom; the jump from mid to pro is about future-proofing and luxury market positioning.
Building Your Kit Over Time
The smartest way to build a real estate photography kit is to let paid jobs fund the next purchase. Start with the starter kit. Shoot 20 to 40 paid jobs at your local market rate (typically $150 to $400 per listing). Roll the profit into the next tier of gear, one piece at a time. Resist any temptation to finance a kit upgrade you can’t afford in cash; the interest on a credit card balance will eat your margins faster than you think, and a piece of gear bought on debt feels worse to use because every shoot feels like servicing the loan rather than building the business. The order most working photographers follow:
- Upgrade the lens before the body. A better lens on your starter body produces visibly sharper files immediately.
- Add a third flash. Multi-flash workflows cut your editing time and improve consistency more than any other single upgrade.
- Upgrade the camera body to full-frame. This is the moment your kit feels professional in the hand and on the file.
- Add the drone, assuming you’ve earned your Part 107.
- Add 3D/virtual tour gear if your market supports the pricing.
According to the NAR Profile of Home Buyers, more than 95 percent of buyers search online before contacting an agent, which is exactly why agents commission professional photography for nearly every listing they take. The market for quality real estate photography is durable; the gear you buy today will earn for years. For more guidance on building the business itself, our piece on how to become a real estate photographer covers pricing, marketing, and client acquisition in depth.
Once your kit is dialed in, branch into higher-value services. Twilight real estate photography commands premium per-shoot pricing with minimal additional gear (a tripod and a wider aperture lens cover most needs). Luxury real estate photography opens the door to long-term agent relationships at higher price points. If you’re working in larger markets like Chicago real estate photography, the volume potential alone can sustain a full-time business off a starter or mid-tier kit while you save for upgrades.
For technique once you’ve got the gear sorted, our guide on real estate photography tips covers the shoot-day workflow that turns competent gear into consistently great photos.
One last note on used gear. The real estate photography market churns through bodies and lenses at a fairly predictable cadence. Photographers who upgrade their Sony A7 IV to an A7V will often sell their A7 IV in excellent condition for 60 to 70 percent of new retail. The same is true of Canon R6 originals being replaced with R6 Mark II bodies, and older 16-35mm lenses being replaced with newer GM II versions. KEH, MPB, and reputable local camera stores carry inspected used inventory with short warranties. If you’re patient, you can build a complete mid-tier kit at starter-tier prices by buying used. The one piece we don’t suggest buying used is the drone; battery degradation and motor wear are hard to spot from photos, and the cost savings rarely justify the risk.
Insurance is the final accessory on the list, and it isn’t optional. A complete real estate photography kit represents $4,000 to $12,000 of gear that travels in your car, gets unloaded at strangers’ homes, and is occasionally flown above suburban neighborhoods. Standard homeowner or renter insurance rarely covers commercial use. Look into a dedicated photographer’s policy from providers like Hill & Usher (PPA’s partner) or Athos. Expect to pay $400 to $900 a year for full equipment coverage plus general liability. The first claim you don’t have to file out of pocket pays for years of premiums.
Frequently Asked Questions
What is the best camera for real estate photography in 2026?
The Sony A7 IV remains the best all-around camera for real estate photography in 2026. It combines full-frame image quality, dual card slots, excellent autofocus, IBIS, and 4K video at a price point that working photographers can justify. For luxury work or higher-resolution needs, the Sony A7R V is the upgrade pick. For starters, the Sony a6700 paired with the Sigma 10-18mm f/2.8 is a complete professional kit at lower cost.
Do I need a full-frame camera for real estate photography?
No, you don’t strictly need full-frame. Crop sensor bodies like the Sony a6700 paired with the Sigma 10-18mm f/2.8 lens produce excellent professional results. Full-frame offers a wider field of view at the same focal length and better dynamic range, but for most residential listings, a well-chosen APS-C setup is genuinely competitive.
What lens do most real estate photographers use?
Most real estate photographers on full-frame use a 16-35mm zoom lens, with the Sony FE 16-35mm f/2.8 GM II and the Sony FE 16-35mm f/4 PZ G being the most common choices. Canon shooters typically use the Canon RF 14-35mm f/4L. For APS-C bodies, the Sigma 10-18mm f/2.8 DC DN is the standard.
How much does a complete real estate photography kit cost?
A starter kit (camera, lens, tripod, two flashes, drone, accessories) costs roughly $3,800 to $4,000. A mid-tier kit runs about $6,800. A pro-tier kit with the latest drone and high-resolution body runs $11,000 or more. Most photographers start with the starter kit and upgrade piece by piece as paid work funds the next purchase.
Do I need a drone for real estate photography?
No, but a drone is the single most effective upsell in this work. Many photographers add a drone six to twelve months into their business once they’re booked consistently. The DJI Mini 4 Pro is the smartest starter drone; the DJI Mavic 4 Pro is the pro pick. You must hold a valid FAA Part 107 Remote Pilot Certificate to fly commercially in the United States.
What flash setup do real estate photographers use?
The standard real estate flash setup is two to four Godox AD200 Pro strobes triggered wirelessly by a Godox X-Pro trigger. Strobes are positioned to bounce off ceilings or walls, lighting the room evenly in a single exposure. Multi-flash workflows produce better results in less editing time than single-flash bracket-and-blend methods.
Is the iPhone or smartphone good enough for real estate photography?
No, not for professional paid work. Smartphone cameras have improved dramatically but still lack the dynamic range, lens correction, and tripod stability needed for consistent professional listing photos. Smartphones are fine for personal use, agent reference shots, or social media content, not for paid listing photography.
Do I need ND filters for real estate photography?
For interior stills, no. For drone video, yes, ND filters are essential for getting cinematic motion blur at the correct shutter speed (twice the frame rate). The DJI-branded ND filter sets for the Mavic 4 Pro and Mavic 3 Pro are precisely tuned and worth the cost. A variable ND filter is occasionally useful for interior video walkthrough services but not necessary for standard photo work.
How many camera batteries do I need?
At minimum 3 batteries per body for a full-day multi-stop shoot. The Sony NP-FZ100 (used in the A7 IV, A7R V, A7V, and a6700) is the standard battery; plan for 3 to 4 genuine Sony batteries or 4 to 5 third-party batteries on a busy day. A dual-bay charger keeps two batteries topping up between shoots so you’re never waiting on power.
RELATED POSTS
View all

Real Estate Photography Camera Settings: The Complete 2026 Guide
June 5, 2026 | by Ian
Real Estate Photographer Los Angeles: The Complete Agent’s Hiring Guide (2026)
September 1, 2026 | by Ian
Real Estate Photographer San Diego: The Complete Hiring Guide (2026)
June 4, 2026 | by Ian